
Think long grind sessions are just about having more stamina? Think again.
The right loadout keeps you farming for hours with fewer town trips, less sorting, and more uptime per hour.
This guide gives a resource-efficient farming loadout for extended grind sessions: immediate loadout blueprint, best tools, inventory and storage rules, route rotations, stamina and cooldown pacing, and consumable plus repair strategies.
Read on for simple, testable setups and quick fixes you can use right now to increase your effective farm time.
Immediate Loadout Blueprint for a Resource‑Efficient Farming Setup

Your loadout needs to fix two things before you even start grinding. You can’t keep running back to town for repairs. And you don’t want to waste time sorting junk when you could be gathering.
Get tools with Unbreaking and Mending (or whatever your game calls the durability perks). They let you keep momentum instead of stopping every twenty minutes to swap gear. Match those with a bag setup that works like auto-sorters: assign specific slots for the stuff you’ll gather most (wood, stone, crops) and leave a few catch-all slots for rare drops. The whole point is stacking uptime so you’re not constantly teleporting out.
Spawn-proof your route. Find a safe spot where mobs can’t touch you but your farm stays active in loaded chunks. Use it for quick AFK breaks. Dying mid-session kills your per-hour rate faster than anything else.
- Tools with durability sustain and gather speed
- Inventory slots pre-sorted by what you’re farming
- Consumables for stamina, health, buffs (enough to last)
- Repair kits so you don’t have to leave
- Movement speed gear to tighten your loops
- Backup tools in case something breaks early
- Auto-collection gear that funnels drops straight into your bags
- Color-coded storage (think shulker boxes) for fast offloads between segments
Tool and Gear Choices for a High-Yield Farming Loadout

Tool choice changes your gather rate more than anything else in your loadout. Fast tools burn through durability but interact with nodes quicker. Use them on dense routes where you can loop back for repairs before they break. Heavy tools flip that trade: slower per node, way longer uptime. Better for sparse routes where repair access sucks.
Auto-proc tools work like observer-piston farms. When you’re harvesting nodes that regrow on timers (bamboo-style, kelp-style), tools with on-hit procs or automatic secondary effects multiply what you get per click. Hybrid mobility tools combine gather speed with movement boosts. They’re good on routes where you’re constantly switching between harvesting and repositioning, cutting the dead time between clusters.
| Tool Type | Strengths | Weaknesses |
|---|---|---|
| High-Speed Gather Tools | Fastest per-node interaction; best for dense spawn clusters; maximizes yield on short, intensive loops | Low durability; requires frequent repair or swaps; inefficient on sparse routes |
| Heavy-Duty Tools | Extended uptime; minimal repair trips; ideal for long routes with limited vendor access | Slower gather speed; lower yield per minute on high-density nodes |
| Auto-Proc/Trigger Tools | Multiplies yield on renewable or respawn-timer nodes; passive secondary collection | Often conflicts with weapon or jewelry slots; gear-slot opportunity cost |
| Hybrid Mobility Tools | Combines gather speed with movement boosts; cuts idle frames; smooth route flow | Lower raw gather speed than pure tools; moderate durability |
When your route includes renewable resources that refresh predictably, auto-proc tools turn every gather into a chance for bonus drops. That stacking effect compounds over hours. On routes where you’re covering ground between clusters, hybrid mobility tools cut the dead time and let you chain gathers without stopping to mount separately.
Inventory, Weight, and Storage Management for Long Grind Sessions

Clogged inventory ends your session faster than any mob. Set up your bags like a hopper sorter: fixed slots for high-volume stuff, flexible slots for rares or overflow. Top two rows for bulk items (wood, stone, common crops), bottom row for gear, consumables, unique drops.
Carry portable storage that works like shulker boxes. Load one or two expansion bags with empty stackable slots, swap them when full instead of teleporting to town. Color-code these by resource type (raw materials, processed goods, vendor trash) so you can offload fast without sorting mid-route.
Weight management is simple. If your loop generates more weight per hour than your bag can hold, either upgrade before you start or build salvaging into your route. Delete low-value items on cooldown. Vendor only when you hit a natural waypoint near a merchant, not when your bags fill.
- Top inventory rows for stackable bulk that fills fastest
- Bottom rows for consumables, repair kits, backup tools
- One backup bag per resource category (raw, refined, trash)
- Salvage threshold: anything below X value gets destroyed on-loop to prevent bloat
- Ender chest or universal storage for dumping high-value items without breaking route
- Pre-sort before starting: remove quest items, cosmetics, duplicate gear
Route Planning and Rotation Efficiency for Continuous Farming Loops
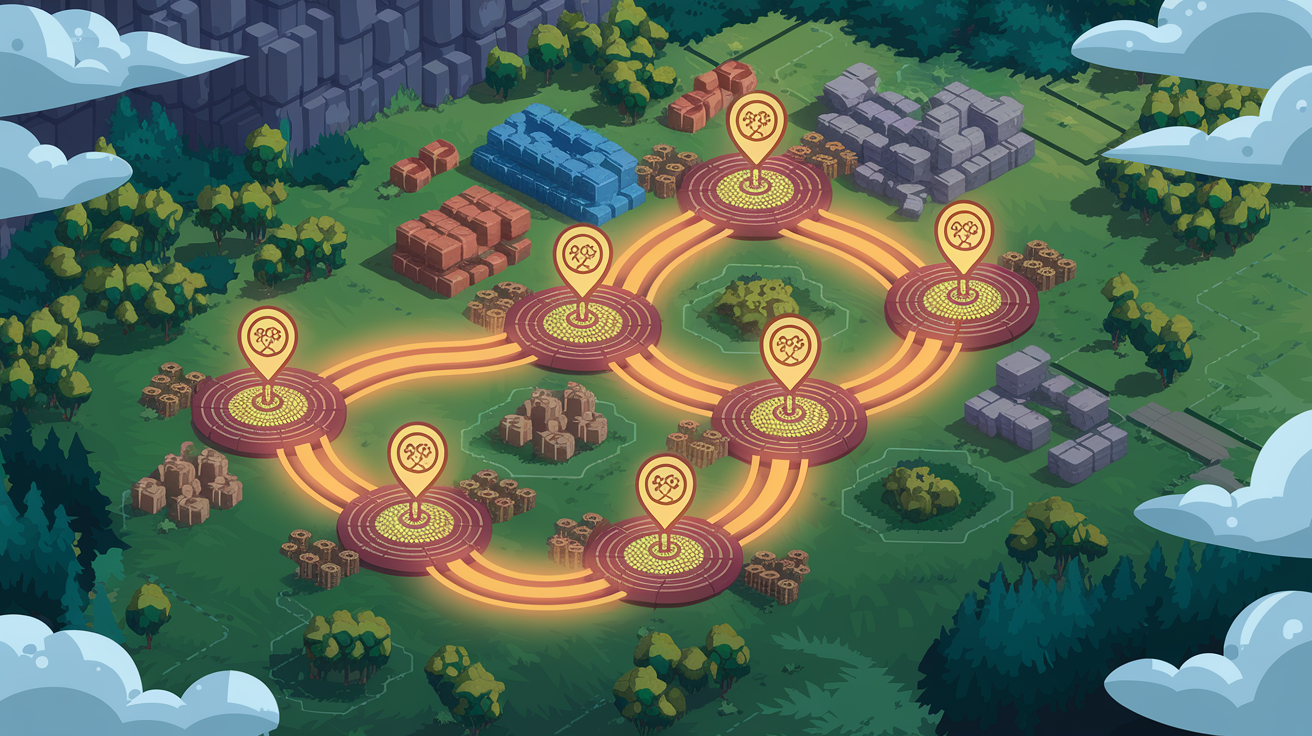
A continuous farming loop depends on predictable spawn timers and zero backtracking. Map three to five high-density node clusters, connect them in a circuit that returns you to the start right when the first cluster respawns. Your route rhythm should match the game’s refresh cadence.
Mark waypoints at each cluster. Note the travel time between them. If one leg takes longer than the spawn timer, you’re wasting uptime. Fix it with teleport anchors, fast travel unlocks, mount speed upgrades. Don’t pick popular routes. Crowded loops force you to wait on spawns, which destroys your per-hour rate.
Chunk loading matters even in non-voxel games. Keep your loop inside zones that stay active while you’re present. Some games unload distant areas or pause spawns when you move too far. Test your route by running one full circuit and checking if the starting cluster has fully refreshed. If not, tighten the loop or add a fourth cluster to fill the gap.
Build AFK-safe zones into your route. Pick one low-risk waypoint where you can pause for restroom or water breaks without logging out. Spawn-proof it and position it so getting back to the route takes under ten seconds. Long sessions need these micro-breaks. Planning for them prevents the mistakes that happen when you try to push through fatigue.
Micro-Adjustments for Path Smoothing
Smoothing your route means cutting every unnecessary input. Tighten turn angles so you don’t overshoot nodes or double back. Use movement boost abilities or dash shortcuts on long straightaways instead of holding forward. Cut idle frames (the moments between finishing one gather and starting the next) by queuing your next action before the current gather completes.
Approach angles matter on dense clusters. Enter from the side that lets you sweep through all nodes in one smooth arc instead of zigzagging. Pre-cast movement buffs before exiting a cluster so you’re already at top speed when transitioning. These feel small but they compound into minutes saved per hour.
Sustaining Stamina, Resources, and Cooldowns for Hour‑Long Sessions

Stamina sustain across long grinds comes down to sequencing your abilities so you never drain completely. Alternate high-cost actions with low-cost or free actions. If your primary gather ability costs stamina, weave in light attacks or movement skills that regenerate while you reposition. You’re pacing resource spend to match natural regen.
DOT-triggered sustain turns kills into resource refunds. Abilities or gear that return stamina or mana on enemy death multiply value on routes with frequent low-HP mobs. Chain these procs by making sure you’re always damaging something, even while moving between clusters. Buff windows matter less on pure gathering routes, but on hybrid farm-and-kill loops, sequence your burst cooldowns so each pack dies during a damage buff, then use the cooldown recovery time to reposition and gather nodes.
- Regeneration on kill passives or gear. Setups that refund resources when you clear mobs turn combat into a sustain mechanic instead of a drain.
- Cooldown alternating. Never cast two long cooldown abilities back to back. Stagger them so one’s always coming off cooldown while you use filler actions.
- Ability uptime pacing. Keep at least one damage over time effect or gather speed buff active at all times to smooth efficiency curves.
- Movement skill chaining. Use abilities that grant movement speed or reposition you as part of your core rotation, not as separate “travel” actions. Cuts wasted inputs.
- DOT-triggered sustain loops. Pair abilities that spread or refresh damage over time with gear that returns resources when those DOTs tick or kill. Creates a self-sustaining cycle on trash-heavy routes.
Consumables, Buffs, and Repair Strategy to Reduce Downtime

Consumable selection for long grinds favors duration over potency. A four-hour food buff that gives moderate stats beats a one-hour buff with peak stats if you’d otherwise spend five minutes per hour reapplying. Load your consumable bar with the longest duration options your budget allows, even if the per-point value is slightly worse.
Potion and elixir pacing should match your loop cadence, not your combat cadence. If your route includes a safe vendor waypoint every twenty minutes, carry exactly twenty minutes of potions and restock on each pass instead of front-loading an hour’s worth. Keeps bag weight down and lets you adjust potion types mid-session if the route changes.
Repair strategy splits into two schools. Preemptive repair means you fix gear at fixed intervals (every thirty minutes or every three loops) regardless of durability remaining. Prevents mid-route breaks. Reactive repair waits until a piece hits critical durability, then swaps to a backup item and repairs in batches during a planned town visit. Preemptive costs more per session but maximizes route uptime. Reactive saves gold but risks dead tool failures if you misjudge durability. For most players, a hybrid works best: carry one backup tool set and repair preemptively only on your highest use items.
AFK-Friendly and Semi-Auto Loadouts for Minimal Interactions

AFK-friendly setups need spawn-proof environments and passive income mechanics. Build or find an enclosed box that mobs can’t enter, position it at a chunk-loaded waypoint where resources or mobs continue to spawn nearby. Your character stays safe while the game world ticks forward, collecting drops via auto-loot passives or proximity collection gear.
Passive income farming methods layer multiple low-interaction systems. Combine auto-harvest tools that trigger on nearby node respawns with storage systems that funnel outputs into expandable bags. In games with redstone-style automation, observer-piston analogs handle the repetitive actions while you manage only the high-value decisions: when to offload, when to repair, when to rotate to a new zone.
AFK safety settings prevent the most common failure modes. Disable auto-run or movement keys to avoid wandering into danger. Set audio cues for inventory full warnings or durability critical alerts so you can return before the system stalls. If your game allows it, bind a panic escape key that logs you out or teleports you to a safe hub instantly.
Macro-friendly bindings help only if they’re within your game’s terms of service. Simple one-button presses that execute a legal in-game action (like activating all buffs in sequence) are usually safe. Multi-action macros that play the game for you are not. When in doubt, design your AFK setup to require a single human input every few minutes. Keeps you compliant and reduces the risk of bans.
- Enclosed AFK box with mob-proof walls and ceiling, positioned in a chunk-loaded or spawn-active area
- Auto-loot or proximity collection gear that funnels drops into bags without manual pickup clicks
- Observer-piston automation equivalents: gear or abilities that auto-harvest renewable nodes on respawn timers
- Audio or visual alerts for inventory full, durability critical, or mob proximity warnings
- Panic escape keybind for instant logout or safe zone teleport in case of unexpected threats
Economic and Profit-Per-Hour Optimization for Long Grinds

Profit per hour calculations start with raw yield tracking. Record your total vendor value or marketable item count after one full hour on your route, then divide by 60 to get profit per minute. Compare that baseline against alternate routes or loadout changes. If a tool upgrade costs 5,000 gold but adds 200 gold per hour, it pays for itself in 25 hours.
Market selling timing turns average routes into high-profit routes. Stockpile high-demand resources during off-peak hours when prices are low, then list them during prime time or after patch notes announce scarcity changes. Loot value research is a fifteen-minute investment that prevents selling underpriced rares. Check recent market history for every unique drop and set a minimum threshold before you vendor.
Salvage versus vendor decisions hinge on processing value. If raw materials vendor for 10 gold but refining them into crafted goods sells for 30 gold, always salvage and refine. If refining costs more time than the 20-gold margin justifies, vendor the raw. Break-even timer analysis tells you exactly when to switch: calculate the minutes required to refine, multiply by your per-minute profit rate, then compare against the margin. If refining takes longer than the margin covers, skip it.
High-density loops with short respawn timers usually beat sprawling routes with rare spawns. A loop that generates 1,000 gold per hour reliably outperforms a 2,000-gold route that depends on rare RNG drops, because consistency compounds over long sessions.
Converting Raw Nodes into Marketable Goods
Refining adds value when the crafted output sells for more than the sum of raw inputs plus your time. Track the conversion rates for your top three farmed materials, then build a refining step into your route cooldown. If your loop has a two-minute respawn gap, spend 90 seconds refining instead of idling.
Trade loops stack profit by turning farmed crops into vendor currency through NPC trades. Automate the crop input, stockpile the output, then batch-convert during low-activity windows. This mirrors villager trading systems where steady supply generates emeralds. You’re turning passive farm time into active economic gain.
| Item Type | Raw Value | Refined Value |
|---|---|---|
| Ore Nodes | 8 gold per unit | 22 gold per ingot (refine cost: 3 gold, time: 30 sec) |
| Crop Bundles | 3 gold per bundle | 15 gold per processed food (refine cost: 1 gold, time: 15 sec) |
| Leather Scraps | 5 gold per scrap | 18 gold per tanned hide (refine cost: 2 gold, time: 20 sec) |
Adaptive Loadout Presets for Different Farming Scenarios

Preset loadouts let you switch configurations in under thirty seconds instead of rebuilding from scratch. Save one preset for pure gathering: max movement speed, auto-loot, durability sustain. Save a second for hybrid farm-and-kill routes: balanced damage, AoE abilities, resource-return gear. Save a third for rare-spawn hunting: high burst damage, single-target focus, loot-drop-rate boosts.
Slotting for efficiency means matching your active gear to the bottleneck of each route. If your loop is node-limited, wear gathering speed gear. If it’s kill-limited, wear damage and AoE. If it’s inventory-limited, wear bag expansions and weight-reduction accessories. Offhand and accessory choices often provide the flex slots for these swaps. Keep three sets of rings or trinkets ready so you can adapt without regearing your entire build.
Minimal gear high-efficiency builds work when you’re low on resources or testing a new route. Strip down to the three most important pieces (gathering tool, movement boost, storage expansion), then run a trial hour to measure baseline yield. Add complexity only when you’ve confirmed the route is worth optimizing.
- Pure gathering preset: movement speed, auto-loot, durability sustain, minimal combat ability
- Hybrid farm-and-kill preset: AoE damage, resource-return on kills, balanced survivability
- Rare-spawn hunting preset: burst damage, loot-drop-rate boosts, single-target focus
- AFK-safe passive preset: passive income gear, spawn-proof positioning, minimal interaction requirements
- Economic trade-loop preset: crop automation, vendor-currency generation, refining efficiency accessories
Safety, Movement, and Route-Risk Reduction During Extended Sessions

Risk assessment during long grinds starts with identifying your two most common death causes, then designing around them. If you die to ranged mobs, add a ranged-pull tool or chain ability to your bar so you control engagement range. If you die to resource drain, adjust your consumable pacing or add a passive regen item.
Emergency escape items belong on a dedicated hotkey, not buried in your bag. Carry a teleport scroll, instant-heal potion, or immunity cooldown that you can hit without looking. Test it once before the session starts to make sure the keybind works under pressure.
Movement path smoothing reduces accidental aggro and fall damage. Stick to tested routes where terrain won’t clip you into walls or drop you off ledges. Mark hazard points on your map (places where one wrong step pulls extra mobs or breaks your loop) and add a visual cue so you remember to slow down.
- Pre-test your escape item keybind at the start of every session
- Mark hazard points (cliffs, dense mob packs, pathing chokepoints) on your map
- Carry one instant-heal consumable separate from your rotation potions
- Set a downtime checklist: repair, restock, bio break every 60 to 90 minutes to prevent fatigue mistakes
Final Words
Mid-run, you should already have the immediate loadout blueprint, the right tool choices, and an inventory plan to stop clogs. Short rotations and micro-adjustments keep things smooth.
Route planning, stamina pacing, and consumable timing keep loops running. AFK-friendly and semi-auto options trim clicks and downtime.
We also covered profit math, adaptive presets, and safety checks so you can pivot fast without wasting runs.
Use this resource-efficient farming loadout for long grind sessions as your baseline, tweak for node density and risk, and you’ll get steadier hours and fewer wipes.
FAQ
Q: What is the most efficient farming method?
A: The most efficient farming method is a high-density, low-interaction loop—start manual, move to semi-auto then full automation, and prioritize spawn-proofed routes, fast gather tools, and sustainable storage to cut downtime.
Q: What are the 7 most important things in agriculture?
A: The seven most important things in agriculture are soil health, water management, crop selection, pest and disease control, proper equipment, market access, and record keeping; these drive yield, resilience, and profit.
Q: What type of farming is most profitable?
A: The most profitable type of farming depends on market and scale, but high-value specialty crops, intensive greenhouse/vertical production, or niche livestock (artisan products, microgreens) usually deliver the best profit per hour.
Q: What resources should I farm in Warframe?
A: The resources you should farm in Warframe are high-demand rare materials and prime parts: Nitain Extract, Argon Crystals, Oxium, Tellurium, Gallium, and Prime parts for ducats; prioritize what your builds and market need.