
Think a Monk can’t tank in Diablo 4? Think again.
This sustain Monk build centers on layered healing, barrier cycling, and nonstop fortify uptime so you stay in melee and shrug off mechanics others can’t.
Read on for advanced survival tactics and situational gearing choices that tell you what to equip, when to swap, and how to recover if you miss timings.
Thesis: follow the playstyle here. Keep spirit flowing, refresh shields before they drop, and pick gear that fixes your weak spots so you outlast tougher fights with repeatable decisions.
Complete High-Survivability Monk Build Overview

Sustain-focused Monk builds turn the class into a relentless force that outlasts opponents through layered healing, barrier generation, and continuous damage reduction. The core philosophy centers on self-healing loops. Every attack fuels fortify, every defensive cooldown restores health, and every spirit-spending action triggers barriers or mitigation. Instead of relying on burst windows or glass-cannon damage, this build maintains constant pressure while absorbing punishment that would flatten most characters. You stay in melee range longer, recover faster, and rarely need to retreat.
The gameplay identity revolves around three pillars: fortify uptime (keeping your threshold above 50% to activate damage reduction), barrier cycling (refreshing shields before they expire), and resource efficiency (generating spirit fast enough to cast defensive skills on cooldown). Healing orbs from skills and passives create a feedback loop. Dealing damage generates orbs, orbs restore life and spirit, spirit funds your next defensive cast. This creates a rhythm where offense and defense are inseparable. When played correctly, you rarely drop below 70% health even in dense pulls.
The build trades raw DPS for survivability. Expect 15 to 25 percent lower peak damage compared to pure offense setups, but you gain the ability to face-tank mechanics that force other builds to disengage. Your survivability scales with enemy density. More targets means more hits, more orbs, and more fortify stacks. This makes the build exceptionally strong in dungeons and sustained boss phases where prolonged melee uptime translates into faster clear times despite the lower per-hit damage.
Core Skill Selections:
- Primary Generator: Fists of Thunder (rapid strikes, short cooldown, high orb generation)
- Spirit Spender: Wave of Flame (AoE damage with fortify generation on hit)
- Defensive Skill 1: Inner Sanctuary (damage reduction zone, extended duration with CDR)
- Defensive Skill 2: Mystic Allies (mobile barriers, absorbs incoming hits)
- Mobility Tool: Flying Kick (dash with barrier generation on landing)
- Ultimate: Seven-Sided Strike (invulnerability frames, burst healing on completion)
Primary Defensive Synergies:
- Fortify generation from spirit spenders keeps damage reduction active continuously
- Barrier refresh on mobility skills creates overlapping shield layers
- Healing orbs scale with maximum life and healing received affixes
- Damage reduction from Inner Sanctuary stacks multiplicatively with fortify DR
- Spirit cost reduction allows defensive casts every 8 to 12 seconds
Essential Gear Pieces and Sustain Affixes:
- Chest with flat damage reduction and barrier duration affixes
- Helm with fortify generation per spirit spent and maximum life
- Gloves with healing received bonus and attack speed for orb frequency
- Pants with spirit cost reduction and close damage reduction
- Boots with movement speed and fortify-on-dash triggers
- Amulet with barrier refresh on skill use and cooldown reduction
Skill Tree Breakdown and Sustain Interactions
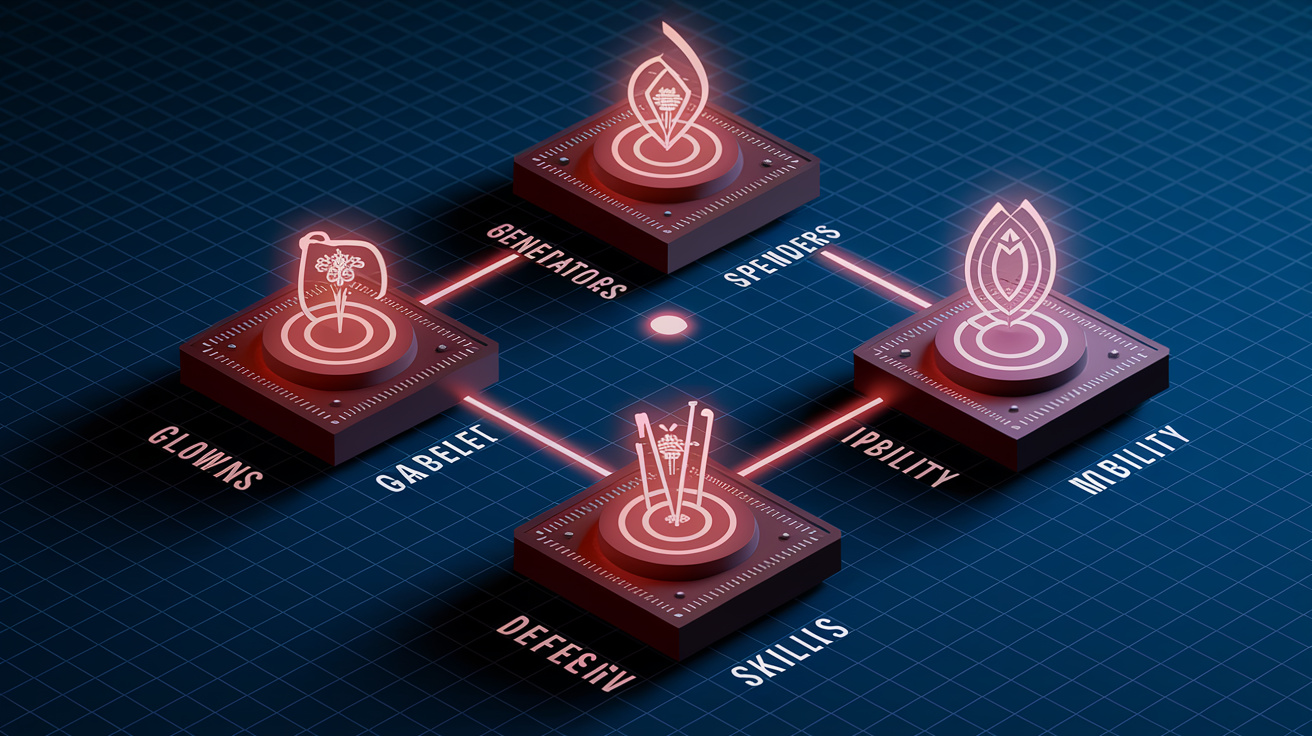
The Monk skill tree for sustain builds branches into four functional categories. Generators that fuel your resource economy, spenders that trigger defensive effects, dedicated mitigation tools, and mobility skills that double as survivability resets. Each category feeds into the next, creating a loop where attacking generates the spirit needed to cast barriers, casting barriers creates space to attack, and mobility resets cooldowns while repositioning. The tree is designed to maximize uptime rather than burst, so every point should either increase your sustain triggers or reduce the cooldowns on your defensive toolkit.
Spirit Generators
Spirit generators are your foundation. Fists of Thunder is the default choice because it hits three times per activation, generating orbs on each strike and building spirit faster than any alternative. Each orb restores a flat amount of life scaled by your healing received affixes, so attack speed and multi-hit generators amplify your passive healing. Generators also proc on-hit effects from gear and aspects, meaning every strike can trigger fortify, barrier refresh, or spirit return. The faster you generate, the more often you can cast your mitigation skills without running dry mid-fight.
Spirit Spenders
Spirit spenders activate your defensive layers. Wave of Flame is the sustain-focused choice because it generates fortify on every enemy hit. Three targets means three stacks, ten targets means ten stacks, and fortify caps fast in dense packs. This fortify feeds into damage reduction passives and keeps your threshold high enough to trigger mitigation aspects. Spenders also benefit from cost reduction affixes, letting you cast twice as often without starving your spirit pool. Every spender cast should be timed to refresh fortify before it expires or to trigger barrier aspects when your current shield drops.
Defensive Skills
Defensive skills provide active damage reduction windows. Inner Sanctuary creates a zone where you and allies take reduced damage for its duration, typically five to eight seconds depending on cooldown reduction rolls. The key is placement. Drop it before heavy mechanics, not after you take damage. Mystic Allies summon entities that absorb hits for you, effectively splitting incoming damage across multiple health pools. These skills are your panic buttons and your sustained mitigation at the same time. Cooldown reduction on gear ensures you can recast before the previous effect expires, maintaining continuous coverage.
Mobility Tools
Mobility tools reset your positioning and trigger on-dash effects. Flying Kick dashes forward and grants a barrier on landing, creating an instant shield layer when you need separation or repositioning. The barrier scales with your maximum life, so high life rolls on gear directly increase your effective health pool from mobility. Mobility skills also break targeting, giving you invulnerability frames during the dash animation. Use them to dodge telegraphed attacks, reposition behind bosses, or escape surrounded situations while maintaining your healing loop through orb generation on the next generator cast.
Defensive Passives and Mitigation Layers
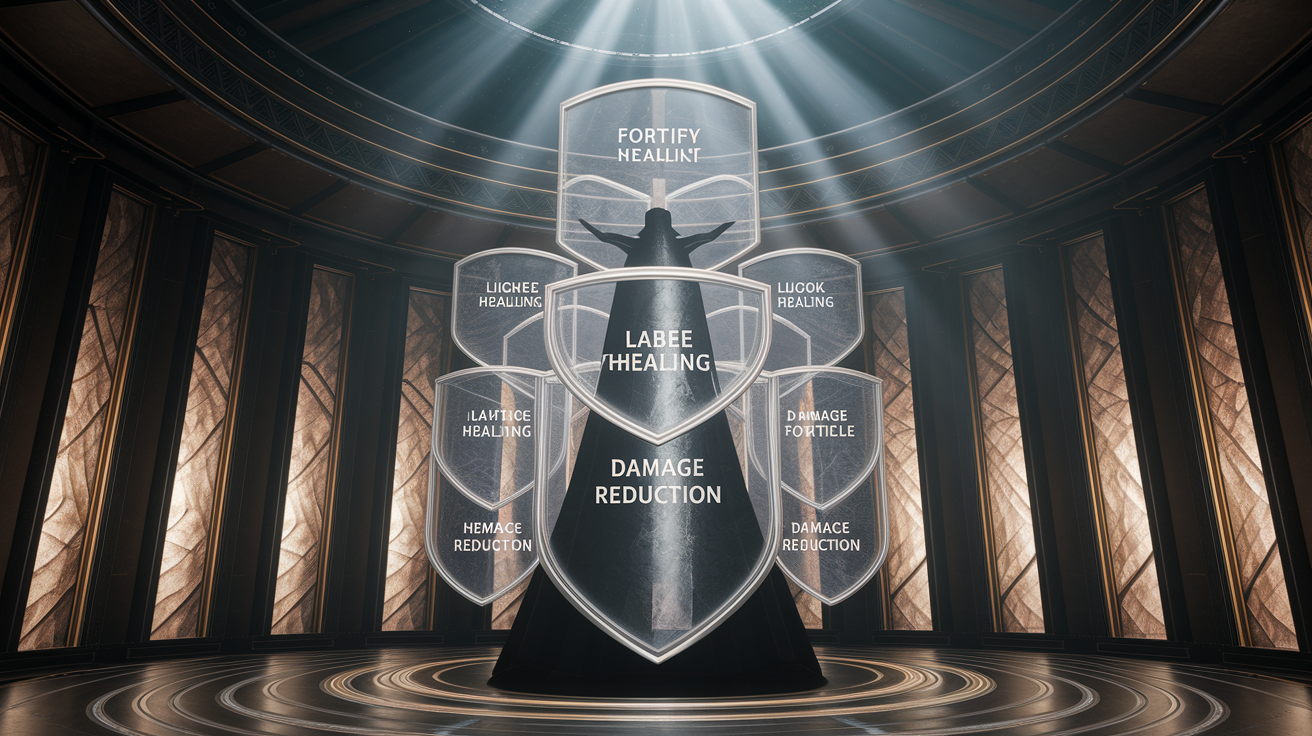
Defensive passives form the invisible scaffolding that turns moderate healing into total durability. The first layer is flat damage reduction from fortify. Passives that increase fortify generation per spirit spent or extend fortify duration ensure your damage reduction stays active through entire encounters. When fortify is above its threshold, you take a percentage less damage from all sources, and this reduction stacks multiplicatively with other sources like Inner Sanctuary or armor. The goal is to maintain fortify uptime above 80 percent of combat time, which requires both generation and duration investment.
The second layer is healing amplification. Passives that increase healing received multiply the value of every orb, every life-on-hit proc, and every barrier refresh. A 20 percent healing received bonus turns a 500-life orb into 600 life, and when you generate five orbs per second, that extra 100 life per orb becomes 500 life per second. These passives also boost potion effectiveness and any life leech from gear, creating a compounding effect where every source of recovery becomes more efficient. Sustain builds should invest in at least two healing-received passives to maximize return on their self-healing loops.
The third layer is conditional damage reduction tied to your actions. Passives that grant DR while channeling, after using a mobility skill, or when surrounded by enemies activate constantly in real gameplay. For example, a passive that gives 10 percent damage reduction for three seconds after a dash means Flying Kick provides both a barrier and a DR buff, stacking two layers of mitigation from one action. These conditional passives reward active play. The more you move, cast, and engage, the higher your effective mitigation climbs.
Key Defensive Passives:
- Fortify Conversion: Increases fortify gained from spirit spenders by 25 percent, ensuring you cap fortify faster in dense encounters.
- Healing Cascade: All healing received increased by 15 percent, applies to orbs, potions, and barrier refresh effects.
- Evasive Guard: Grants 12 percent damage reduction for four seconds after using a mobility skill, stacks with other DR sources.
- Spiritual Resilience: Spirit cost of defensive skills reduced by 20 percent, allowing more frequent casts without draining your pool.
- Barrier Mastery: Barrier duration extended by two seconds and refreshes if reapplied before expiration, creating overlapping shield windows.
Sustain-Oriented Legendary Aspects

Legendary aspects transform sustain from passive to proactive by adding triggers, multipliers, and conditional effects that scale with your playstyle. The most critical aspects are those that create self-healing or barrier loops. When you hit an enemy, when you spend spirit, or when you take damage. These triggers fire constantly in combat, turning every attack into a defensive action. Sustain aspects also modify your core skills to generate fortify, reduce incoming damage, or return resources at low health, ensuring you always have an option to recover even when caught off guard.
Six Sustain-Oriented Aspects and Their Interactions:
- Aspect of Echoing Fury: Generates a barrier equal to 10 percent of maximum life whenever you cast a defensive skill. Barrier stacks with existing shields and refreshes duration if reapplied before expiration. Synergizes with short-cooldown defensive casts like Mystic Allies.
- Aspect of the Protector: Grants fortify equal to 15 percent of damage dealt when you hit three or more enemies with a single skill. Triggers on every Wave of Flame cast in dense packs and keeps fortify threshold maxed.
- Aspect of Disobedience: Each time you deal damage, gain a stack of armor for six seconds, stacking up to 25 times. At max stacks provides massive flat damage reduction that compounds with fortify and other DR layers.
- Aspect of Regenerative Strikes: Healing orbs restore 8 percent more life and generate two spirit per orb collected. Doubles the value of orb-based healing loops and funds defensive skill casts.
- Aspect of Might: Basic skills grant 20 percent damage reduction for five seconds. Activates on every Fists of Thunder cast, creating permanent uptime of 20 percent DR if you maintain generator rhythm.
- Aspect of Quickening Pulse: Reduces all defensive skill cooldowns by 15 percent when you consume a healing orb. Creates a feedback loop where attacking generates orbs, orbs reduce cooldowns, reduced cooldowns let you cast more defensive skills, and defensive skills keep you alive to attack more.
Optimal imprint slots for these aspects prioritize high-frequency triggers on weapons and off-hands, barrier and fortify aspects on chest or helm where maximum life rolls amplify their scaling, and cooldown-dependent aspects on gloves or amulet where CDR affixes multiply their uptime. Place Aspect of Might on your weapon so every generator hit refreshes the DR buff, and reserve your chest slot for Echoing Fury to maximize barrier scaling from your highest life roll. Avoid placing resource-return aspects on jewelry unless you need fine-tuning. Use those slots for resistance or damage reduction affixes instead.
Paragon Boards and Glyph Pathing

Paragon boards extend your sustain potential by unlocking nodes that amplify fortify, healing, and damage reduction while providing stat clusters that increase your maximum life and armor pools. The optimal board sequence starts with defensive foundations. Boards that offer fortify generation, healing received, and close-enemy damage reduction, then branches into boards with multiplicative damage reduction glyphs and spirit cost nodes. Early boards should prioritize flat survivability increases, while later boards can add conditional offense that scales with your uptime advantage.
The pathing strategy is to rush defensive rare nodes first, then socket glyphs that enhance fortify or barrier effects, and finally connect to adjacent boards through nodes that grant maximum life or armor. Avoid wasting points on purely offensive paths until you’ve unlocked at least three major sustain clusters. Your damage scales with your ability to stay in melee range, so survivability directly translates to DPS uptime. Respec between content types by toggling glyph sockets rather than repathing entire boards, which lets you shift from dungeon sustain to boss sustain without rebuilding from scratch.
Primary Sustain Glyphs
Sustain glyphs modify your existing mechanics to scale harder with defensive actions. The Fortify glyph increases fortify generation by a percentage and grants damage reduction when fortify is active, creating a double benefit from the same stat. The Guard glyph reduces damage taken from close enemies and increases healing received when surrounded, rewarding aggressive positioning. The Spirit glyph reduces spirit costs and grants barrier on spender casts, turning your offense into a shield generator. These glyphs should be placed in boards with high-density rare nodes so their radius bonuses cover as many powerful nodes as possible.
| Board Name | Key Node | Sustain Benefit | Recommended Glyph |
|---|---|---|---|
| Survival Instinct | Fortified Life | +12% fortify generation, +8% max life | Fortify (damage reduction while fortified) |
| Ancestral Guidance | Healing Aura | +15% healing received, orbs grant spirit | Guard (DR from close enemies) |
| Inner Focus | Spiritual Barrier | Barrier refresh on defensive casts | Spirit (barrier on spender use) |
| Relentless Advance | Mobile Defense | DR after mobility skills, +10% movement speed | Exploit (increased damage while fortified) |
Stat Priorities for High Survivability

Stat priorities for sustain monks follow a strict hierarchy. Damage reduction and healing amplification first, resource efficiency second, and offensive stats only after your defensive foundation is unshakable. The top priority is flat damage reduction from affixes and passives, which stacks multiplicatively with fortify and conditional DR to create layered mitigation that reduces incoming damage by 50 to 70 percent in real gameplay. Maximum life comes next because every point of life increases the value of barriers, fortify thresholds, and percentage-based healing. High life pools also give you more room to recover when mistakes happen.
Healing received multiplies the effectiveness of orbs, potions, and life-on-hit, turning small trickle heals into significant recovery. Spirit cost reduction ensures you can cast defensive skills on cooldown without running dry, which is critical in long boss phases where orb generation slows. Barrier generation bonuses increase the size and frequency of your shields, creating overlapping protection layers. Only after these five stats are covered should you invest in critical strike, attack speed, or elemental damage. Your job is to survive first, kill second.
Affix Priorities (Ranked):
- Damage Reduction (Close/Distant/Overall): Flat percentage reduction from all sources, stacks multiplicatively, aim for 30+ percent total from affixes alone.
- Maximum Life: Highest life pool possible, increases barrier size and fortify threshold, prioritize on chest and pants.
- Healing Received: Percentage increase to all healing, critical for orb-based sustain, target 20+ percent from gear.
- Spirit Cost Reduction: Lowers defensive skill costs by 15 to 25 percent, ensures continuous cast uptime.
- Barrier Generation: Increases barrier size and refresh frequency, synergizes with aspects that trigger shields on skill use.
- Cooldown Reduction: Reduces defensive skill cooldowns, allows overlapping mitigation windows, aim for 15+ percent total.
Situational Gear Variants (Boss, Dungeon, PvP)
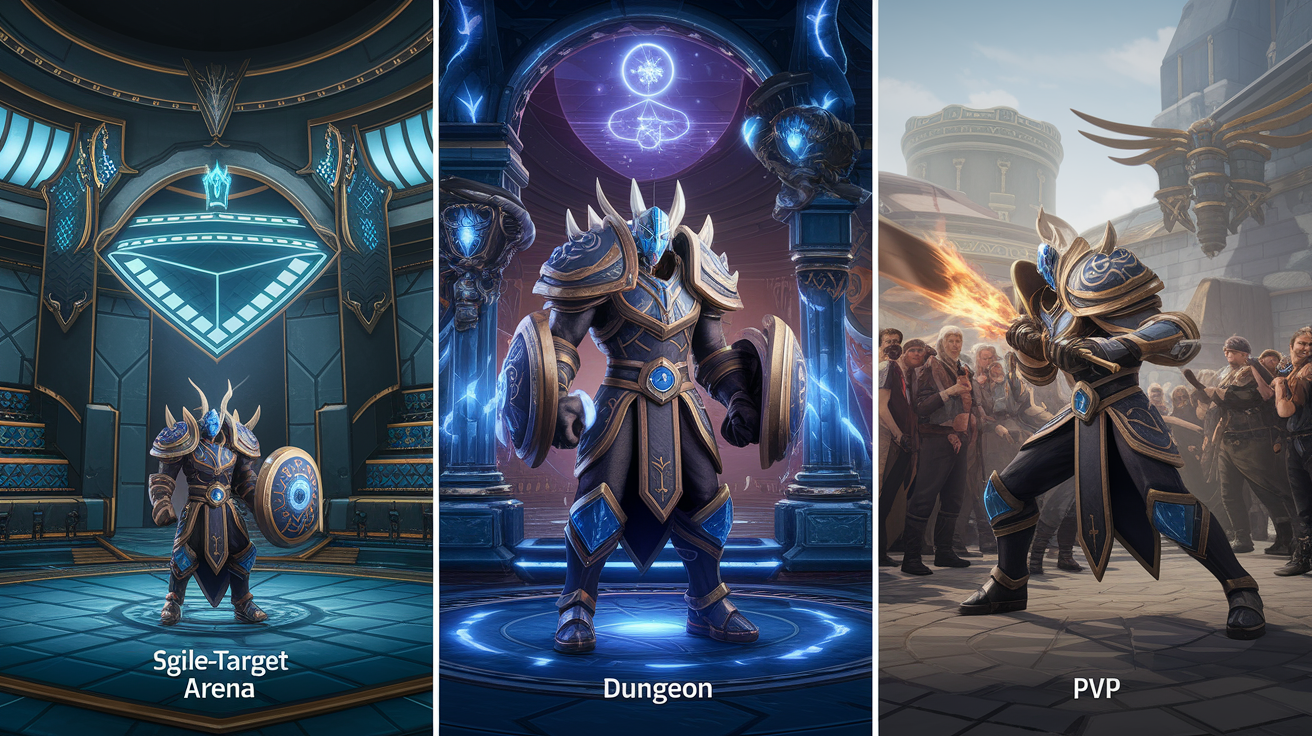
Boss Variant
Boss fights demand sustained single-target pressure combined with consistent self-healing and timed mitigation windows for predictable burst mechanics. The boss variant shifts away from AoE fortify generation and instead prioritizes barriers that refresh on defensive casts, cooldown reduction to ensure Inner Sanctuary and Mystic Allies are always available, and maximum life rolls to absorb unavoidable damage spikes. This setup trades clear speed for the ability to tank multi-phase mechanics and recover between attack windows.
- Chest with barrier-on-defensive-cast aspect and maximum life roll to maximize shield size during burn phases
- Gloves with cooldown reduction and healing received to keep defensive skills rotating and amplify orb value when DPS windows are short
- Amulet with spirit cost reduction and fortify generation to maintain resource flow during long phases with few targets
- Boots with movement speed and damage reduction from distant enemies to kite telegraphed attacks while maintaining DPS uptime
Dungeon Variant
Dungeon builds optimize for sustained combat in dense packs where fortify generation spikes, orb frequency is highest, and AoE mitigation layers stack to absurd levels. The dungeon variant uses damage-reduction-on-kill affixes to chain mitigation between packs, spirit-on-hit to fund continuous spender casts, and barrier refresh on mobility to reset shields after every pull. This setup sacrifices single-target cooldown stacking for the ability to face-tank entire rooms without retreating.
- Helm with fortify-on-spender aspect and spirit generation per hit to capitalize on multi-target Wave of Flame casts
- Chest with damage reduction that increases per nearby enemy, scaling mitigation directly with pull size
- Pants with spirit cost reduction and orb collection radius to maintain resource flow and gather healing faster in chaotic pulls
- Weapon with on-hit barrier triggers to layer shields with every generator strike, creating constant shield refresh loops
PvP Variant
PvP survivability relies on crowd-control resistance, burst mitigation windows, and counter-sustain that activates when you take damage rather than when you deal it. The PvP variant removes reliance on orb generation (unreliable against mobile players) and instead uses barrier-on-damage-taken triggers, damage reduction from player sources, and cooldown resets tied to taking hits rather than dealing them. This setup is built to absorb player burst, counter with sustained pressure, and outlast opponents in extended trades.
- Chest with barrier generation on taking damage and flat damage reduction from players to survive opening bursts and create immediate counterplay windows
- Helm with crowd-control duration reduction and maximum life to minimize disable chains and maintain health pool against coordinated focus
- Amulet with cooldown reduction on taking damage and fortify-on-hit to turn incoming attacks into defensive fuel
- Boots with tenacity (CC resistance) and movement speed to avoid chain disables and maintain mobility during team fights
Resource Management and Sustain-Optimized Rotation

Resource management for sustain monks is a balancing act between generating enough spirit to cast defensive skills on cooldown and avoiding full-pool waste where spirit generation is lost because you’re already capped. The core rhythm alternates between generator casts to build spirit and orbs, spender casts to trigger fortify and barriers, and defensive cooldowns timed to refresh before their previous effect expires. Spirit should never sit at zero for more than two seconds or at cap for more than one second. Empty means you can’t react, full means you’re wasting generation.
Cooldown timing is the second layer. Inner Sanctuary and Mystic Allies have fixed cooldowns that you reduce through gear, but the real optimization is casting them early rather than reactively. If Inner Sanctuary has a 12-second cooldown and lasts six seconds, you want to cast it every 12 seconds on rhythm, not save it for emergencies. This creates 50 percent uptime of guaranteed damage reduction, and with cooldown reduction rolls you can push that to 60 or 70 percent. The same logic applies to barriers. Refresh before they expire, not after they break.
Sustain Rotation Cycle (Five Steps):
- Open with three Fists of Thunder casts to generate spirit, orbs, and proc on-hit effects. This builds your initial fortify and fills spirit to 60 to 80 percent.
- Cast Wave of Flame into grouped enemies to cap fortify and trigger barrier aspects. Spend spirit down to 30 to 40 percent, leaving enough for a defensive emergency cast.
- Drop Inner Sanctuary before the next damage window or mechanic. Don’t wait until you need it, cast it on cooldown to maintain uptime.
- Alternate Fists of Thunder and mobility (Flying Kick) to maintain orb generation, refresh barriers from dash, and reposition during mechanics. Never stand still.
- Recast Mystic Allies and defensive spenders every 10 to 15 seconds as cooldowns refresh, layering mitigation windows so you always have at least one active DR source running.
Final Words
You’re cycling generators, stacking fortify, and holding barrier while you pick fights. This guide broke down the sustain philosophy, skill tree picks, defensive passives, sustain aspects, paragon paths, stat priorities, and three situational gear variants so you know what to change when the fight shifts.
Next: pick one variant, lock core affixes, and run a few key bosses to learn the rotation and timing.
Use this Diablo 4 sustain monk build guide and situational gearing choices to test, adapt, and survive more. Game on.
FAQ
Q: What is the best way to get gear in Diablo 4?
A: The best way to get gear in Diablo 4 is to run high-level endgame content like Nightmare Dungeons, Helltides, and World Bosses, then use crafting and targeted farming to chase specific affixes.
Q: How good is the monk in Diablo 3?
A: The Monk in Diablo 3 is a strong, versatile melee class that excels at mobility, speed-clearing, and team support; its viability varies by season and patch but it usually stays competitive.
Q: What to prioritize in Diablo 4?
A: In Diablo 4 prioritize survivability (life, damage reduction), consistent damage, item level and useful affixes, plus progression activities—Nightmare Dungeons and Helltides—that reliably scale loot and power.
Q: How to upgrade items in Diablo 4 season 11?
A: To upgrade items in Diablo 4 Season 11 use the crafting/upgrade NPCs and seasonal currencies, spending materials gained from dungeons, Helltides, and event rewards to raise item power and roll better stats.