
Holding the zone is overrated — controlling the routes around it wins S+ matches.
Get to the center first, then push to the perimeter and deny the main approaches.
This short guide gives clear roles and simple rotations.
You’ll learn when to anchor sightlines, bait flanks, and time specials to flip or stall the zone.
I also highlight the common recovery lines when things go wrong, so you don’t feed staggered spawns.
Read this if you want practical S+ map control steps you can use in ranked now.
High-Level Map Control Principles for S+ Ranked Zones
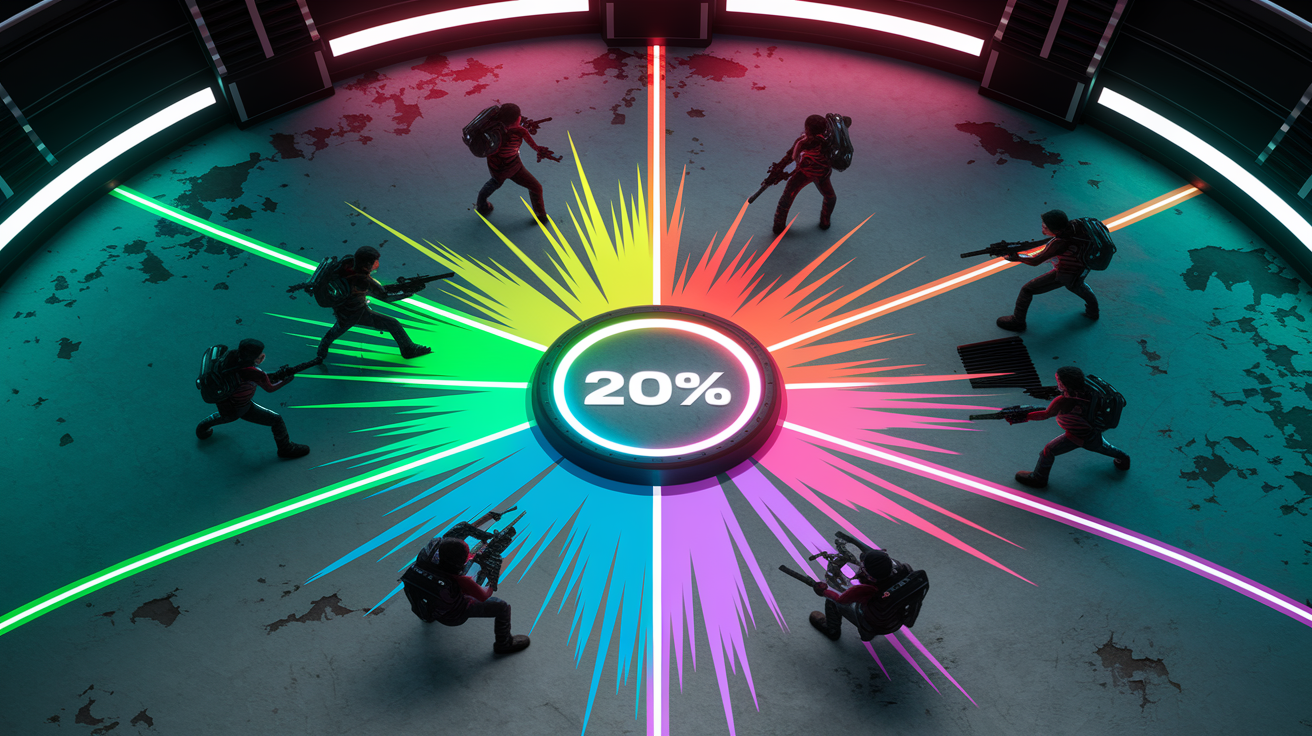
You need to secure the center before the zone even lights up. The team that gets there first forces everyone else into awkward 1v1s away from the objective, and those fights are way easier to win. You’ve got five minutes in 4v4 Anarchy, and the winner’s whoever hits zero first or holds the lower score when time runs out. The zone flips once you paint about 70% of it your color, so raw turf volume equals control. Once you flip it, your countdown starts and the enemy inherits a penalty if they held it before. Short holds mean small penalties. A team that held for 60 points? They’re looking at a much bigger penalty when they lose it. Even with a +24 penalty, a team at 40 beats a team at 50 with no penalty, because penalties only block scoring during the match. They don’t change who wins at the end.
The biggest mistake at high rank is camping inside the zone after you capture it. Holding the zone itself matters less than controlling the routes that lead to it. The zone’s a natural choke where both teams collide, so the real fight happens on the approaches. Long range picks from Splatlings or Snipers can flip the zone in seconds if your team clusters inside, and every flip triggers another penalty window. Move to the perimeter, deny paths, force the enemy into predictable lanes where your backline can punish them. Early aggression pays off because it pushes opponents past the zone and creates space for your team to safely count down. If you lose control, retreat and regroup instead of trickling back one at a time. Solo feeds create staggered spawns. Staggered spawns lose matches.
To dominate early and hold the advantage:
Rush center at spawn and commit at least two players to the initial paint fight. Identify the 2 to 4 main approach paths to the zone and assign coverage right after capture. Rotate one player to deny flank routes while backline holds sightlines on primary lanes. Track enemy special readiness via the HUD and stall pushes when they have two or more specials ready. Practice holding 30 point and 60 point countdown windows in scrims to learn penalty thresholds and recovery timing.
Read more about zone capture and scoring fundamentals to understand how paint priority translates into match control.
Advanced Zone Pressure Tactics for S+ Control

Offensive zone pressure isn’t a single action. It’s a sequence. Start by painting the neutral turf between spawn and the zone to create movement lanes for your team. Next, position your backline Splatling or Sniper at a safe distance to suppress enemy approach angles. Don’t push the backline into contested space. Their job is to force the enemy into 1v1s with your frontline, not to feed. Once your paint’s in place and your backline’s holding sightlines, coordinate a special to either pause the enemy countdown or forcibly flip the zone. Ink Storm stalls enemy scoring by denying them safe turf. Tenta Missiles displaces their backline and opens gaps for your frontline to collapse. Trizooka clears the zone from range or punishes enemies behind cover. Triple Inkstrike can instant flip a zone if timed correctly.
Defensive zone pressure is about containment. Once you hold the zone, shift from painting the center to controlling the map. Your backline anchors a long sightline that covers the most dangerous approach path. Your midline rotates between flanks to plug gaps and contest turf. Your frontline pushes slightly past the zone to deny the enemy room to organize a coordinated retake. If the enemy commits a special, back out and regroup rather than feeding into it. Let the special expire, then re-establish your positions. If you lose the zone, don’t trickle. Wait for at least two teammates to respawn, coordinate a special, retake as a unit. Solo retakes fail and create penalty windows that swing the match.
Pressure Sequencing Breakdown
Ideal pressure rotations follow a four step loop. First, paint the neutral space between your spawn and the zone to create safe movement paths and deny the enemy room to set up. Second, position your backline to suppress the enemy’s primary approach lane while your frontline contests the zone perimeter. Third, use a coordinated special to either clear the zone, stall the enemy countdown, or displace their backline. Fourth, collapse into the zone as a team to secure or maintain control, then immediately rotate back to perimeter positions to deny the next enemy push.
The exact execution timing follows this order:
- Commit two players to the initial paint fight within the first 15 seconds to establish turf dominance.
- Assign backline to a long sightline and frontline to the most contested flank within 5 seconds of capturing the zone.
- Coordinate the first special usage between 20 and 40 seconds into the match to either extend your countdown or disrupt an enemy retake.
- Rotate one player off zone to deny secondary flank routes within 10 seconds of any enemy special usage or after your team secures a pick.
Weapon Role Assignments for Map Control in S+ Ranked

Weapon roles define how your team controls the map. Every role has a specific job, and mixing them correctly creates the pressure loops that win matches.
Backline Anchors and Sightline Control
Backline anchors hold long sightlines and punish enemy approaches before they reach the zone. Heavy Splatling and Hydra Splatling are the strongest backline choices for Splat Zones because they combine range with high damage output. Chargers work if your team can protect them, but Splatlings are more forgiving and apply consistent pressure without needing precision shots. Hydra’s Booyah Bomb can clear or capture a zone instantly, making it a clutch tool for retakes. The backline’s job isn’t to push forward. Stay at a safe distance, hold your angle, force the enemy into your frontline’s kill range. If you die, the enemy gains free access to the zone.
| Weapon | Range Role | Special Impact |
|---|---|---|
| Heavy Splatling | Long range suppression and consistent damage output | Wave Breaker for area denial and stall tactics |
| Hydra Splatling | Maximum range with highest damage per volley | Booyah Bomb for instant zone clear or capture |
| Splat Charger | One shot picks on exposed targets | Ink Vac for counter special and team protection |
Frontline & Slayer Positioning
Frontline players contest close range fights and deny enemy access to the zone perimeter. Octobrush excels here because of its movement speed and Zipcaster special. Zipcaster can disrupt the enemy backline and create openings for your team to push, even if you don’t secure a splat. .52 Gal provides strong 1v1 kill pressure and can hold contested choke points. Rapid Blaster covers turf quickly with burst shots and can hit enemies behind cover. Frontline players shouldn’t stand inside the zone. Push slightly past it to intercept enemy approaches and force them into predictable lanes.
Close range engagement rules for frontline players:
Don’t commit to a 1v1 without knowing where the enemy backline is positioned. Use the zone’s terrain and cover to bait enemy aggression, then collapse with a teammate for the punish. Rotate off contested ground when low on ink or health instead of feeding a kill to the enemy slayer.
Support & Midline Paint Control
Support and midline weapons farm specials, cover turf, plug gaps in your team’s map control. N-Zap ’85 is one of the strongest support picks because it paints quickly, wins 1v1s with good positioning, and provides Tacticooler to boost team mobility. Splash-o-matic and Splattershot Jr. also excel at rapid paint coverage and special charge. The midline player rotates between the zone and flanks, ensuring that your team always has vision on secondary approach paths. Your job isn’t to secure kills. Your job is to paint enough turf that your team can move freely, farm your special as quickly as possible, and use it to enable your frontline or backline to make plays.
Rotation Paths, High Ground Control, and Mid Control Strategies
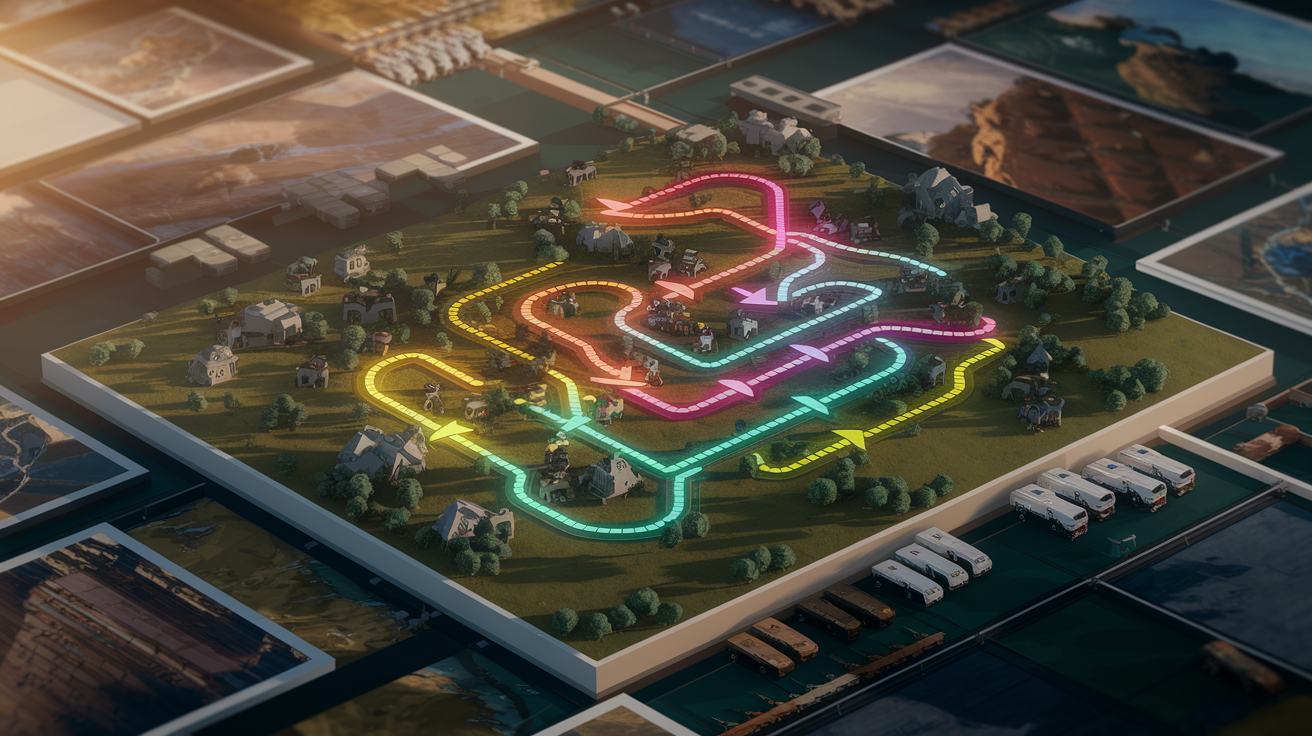
Every Splat Zones map has 2 to 4 main approach paths that lead to the zone. Controlling these paths is more important than controlling the zone itself. At the start of the match, assign coverage to each path based on weapon range. Your backline anchors the longest sightline, usually from high ground or a safe angle that covers the enemy’s primary route. Your frontline contests the most aggressive flank, forcing the enemy to either commit resources to clear it or abandon that path entirely. Your midline rotates between the remaining paths, plugging gaps and maintaining paint pressure so the enemy can’t organize a coordinated push.
High ground control is critical on maps like Undertow Spillway, Sturgeon Shipyard, and Mahi-Mahi Resort because elevated positions give your backline uncontested sightlines and force the enemy to fight uphill. If the enemy controls high ground, don’t feed into it. Use specials to displace them or rotate to a secondary path and force them to reposition. Safe drops exist on every map, but avoid blind drops into contested space. Museum d’Alfonsino’s center drops are a common death trap for backliners who drop without vision. If you can’t see where the enemy is, don’t drop. Use a beakon or wait for a teammate to clear the area first.
| Rotation Type | Objective | When to Use |
|---|---|---|
| Early Push | Secure the zone and establish perimeter control before the enemy can set up | At match start and after any team wipe |
| Mid Hold | Deny enemy approach paths while counting down points | After capturing the zone and securing at least one pick |
| Late Retake | Coordinate specials and collapse as a unit to flip the zone when behind | When losing the zone or when the enemy has a strong countdown lead |
Understand role based map rotations and positioning fundamentals to refine your team’s path coverage and rotation timing.
Ranked Mode Variations: Zones, Tower, Rainmaker, and Clams Map Control Differences
Splat Zones is a paint priority mode. The team with better turf coverage wins the zone, and the team that controls the approaches holds it. Two players can usually capture most zones, so coordinate to avoid feeding solo. If the enemy has superior paint potential, increase pick pressure to force them off turf. If your team has the paint advantage, contest aggressively and use paint focused specials to clear or instant capture. The penalty system punishes zone flips, so holding continuous control for even short windows is better than yo-yoing back and forth. When stalemated, commit two players to the zone while the other two look for clean picks to swing the paint balance.
Tower Control is about checkpoint timing and player assignments. Most maps have multiple checkpoints, and securing each one grants a distance advantage. Form two duos, one to push into enemy turf and apply pressure, and one to protect the tower rider. Use the pole on the tower as cover and “dance” around it to reduce incoming damage. Save your specials for checkpoint clears because supportive specials like Big Bubbler and Ink Vac have the highest value when contesting checkpoints. Blasters and Chargers excel at clearing the tower from range, so if the enemy has one, don’t cluster. Spread out, force them to choose a target, punish their positioning when they commit.
Rainmaker is a carrier focused mode with 1 to 2 checkpoints per map. The carrier can’t use their main weapon or special, so exploit this by checking the top HUD to see who’s carrying. If a Backliner or Support is holding the Rainmaker, collapse and punish them. Securing the first checkpoint grants a +1 point edge, so coordinate which checkpoint to take and commit resources to hold it. Pop the Rainmaker shield whenever possible because bombs and armor explosion specials both paint and can secure kills. Object Shredder and Swim Speed Up are high value abilities for Rainmaker because they let you shred the shield faster and reposition the carrier more aggressively.
Clam Blitz is a math mode. Eight clams create a Power Clam, and you can carry one Power Clam or seven regular clams. Hold at seven clams before committing to a push, and give the Power Clam to your Backliner or Support when possible because they’re safer carriers. The Pity Power Clam spawns when the enemy scores, but don’t auto pick it. Leave it until your basket is opened or until you’re ready to organize a coordinated push. Picking the Pity Clam early can force overtime or enable better counter pushes. Don’t dunk a lone Power Clam without teammates. Use specials to support coordinated dunks, and practice with at least one consistent teammate to reduce random team disorganization.
Learn mode by mode control differences to adapt your map control principles to each ranked objective.
Special Weapon Timing for Zone Retakes and Control Holds
Anchor players hold the most important specials in the match. Anchors farm specials quickly because they survive longer, so coordinate exact timeout windows to synchronize zone retakes or denial plays. Ink Storm stalls the enemy countdown by forcing them off turf. Tenta Missiles displaces their backline and creates openings for your frontline to collapse. Trizooka clears the zone from range or forces the enemy to abandon their position. Triple Inkstrike can instant flip a zone if you coordinate it with a teammate’s push. Zipcaster disrupts the enemy backline and creates chaos that your team can exploit, even if you don’t secure a splat.
Don’t waste specials on solo plays. Coordinate with your team so that one special creates the opening and another secures the follow up. If the enemy has two or more specials ready, delay your push until they waste them or until you can counter with your own specials. Tacticooler provides a team wide buff, but it often encourages solo rushed plays that feed kills. Avoid solo commits when it’s active, and coordinate your team to stop buffed pushes before they reach the zone. Crab Tank and Tri-zooka are high threat specials that can clear a zone alone, so maintain distance, call them out, force the user into poor angles or waste time until the special expires.
Timing cues for chaining specials and maximizing control:
- Use your first paint focused special between 20 and 40 seconds into the match to extend your initial countdown or disrupt the enemy’s first retake attempt.
- Hold your second special for the enemy’s first coordinated push, usually between 1:00 and 1:30, to counter their special usage and maintain control.
- Chain two specials within 10 seconds of each other during retakes to guarantee zone flips, one to displace the enemy and one to secure the capture.
- Save at least one special for the final 30 seconds of the match to either extend your countdown or deny the enemy’s last retake attempt.
Counter Strategies Against Common S+ Team Compositions
Long range compositions rely on Splatlings, Chargers, and Snipers to deny approaches and force your team into predictable lanes. The counter is to force angle changes and use Zipcaster or flanking paths to destabilize their backline. Don’t feed into their sightlines. Rotate to secondary paths, use bombs to displace them, coordinate a special to either force them to reposition or create an opening for your frontline to collapse. If the enemy backline is immobile, punish them with aggressive flanks and force them to waste time repositioning instead of holding their angle.
Short range rush compositions rely on speed and close range kill pressure to overwhelm your team before you can set up. The counter is paint denial and spacing. Use bombs to slow their approach, maintain distance with your backline, force them into 1v1s where your range advantage wins. If they commit specials to close the gap, back out and let the special expire instead of feeding into it. Track their special icons on the HUD and avoid clustering when they have Booyah Bomb or Crab Tank ready. Special stacking is common at S+ rank, so if the enemy has three or more specials ready, delay your push and force them to use specials inefficiently.
Countermeasures for long range compositions:
Use Point Sensor, Ink Mines, and Angle Shooter to deny unseen flanks and force the enemy backline to reposition or risk getting caught. Coordinate Zipcaster or aggressive flanks to pressure the backline and force them to abandon their sightline. Avoid clustering in predictable lanes and rotate between paths to create confusion and force the enemy to split their attention.
S+ Level Scrim, VOD Review, and Improvement System for Map Control Mastery

S+ map control isn’t built in ranked matches. It’s built in scrims, VOD review, and targeted drills. Private 4v4 scrims let you test map specific strategies without rank pressure, and SendouQ best of 7 sets simulate tournament pacing and clutch pressure scenarios. Record your scrims from the anchor’s POV because anchors have the widest sightlines and provide the best replay perspective. Use Insights.gg to draw and annotate over VODs, and Watch2Gether to synchronize team review sessions. Focus VOD review on zone control breakdowns, special timing failures, and rotation mistakes. Isolate the exact moment control was lost, identify which player was out of position, adjust your rotation assignments to prevent the same mistake in the next scrim.
Movement and tech practice should be a daily warmup. Create custom drills in the training room to practice sub strafing, charger flicks, and quick turn angles. Study at least 25 technical tricks and niche mechanics to expand your contest options and surprise opponents during zone fights. Map callout directories and the Sendou.ink map planner are essential tools for predefining hold points, flank routes, and spawn pressure vectors for each ranked map. Practice load recommendations are under five sessions per week to avoid burnout. Scrim teams work best with 5 to 6 players to provide redundancy for absences. The mental game accounts for 50% of competitive success, 20% game knowledge, 15% teammates, 10% mechanics, and 5% luck. Mental resilience directly correlates to consistent pressure execution, so stop playing when tilted, take breaks, use positive self review to reinforce confident play during critical zone contests.
| Practice Type | Goal | Frequency |
|---|---|---|
| Movement drills | Improve sub strafing, quick turn angles, and contest timing precision | Daily 10 to 15 minute warmup before ranked or scrims |
| Callout and communication practice | Reduce decision latency by standardizing region, position, and directional calls | Every scrim session; review callout accuracy in VOD |
| Map control scrims | Test rotation assignments, special timing, and zone hold consistency | 2 to 4 sessions per week; avoid exceeding 5 total practice days |
Final Words
In the action, we covered high-level map control, advanced pressure sequencing, weapon roles, rotations, mode tweaks, special timing, counters, and a practice loop.
Takeaway: force approach-denial, control routes more than the center, hold 30–60 point windows, chain specials with teammates, and rotate off-zone to stabilize flanks.
Apply the drills and calls to sharpen Splatoon 3 S+ map control and zone pressure tactics for ranked matches. Start this session with one focus and build from there. You’ll see progress fast.
FAQ
Q: What percentage of Splatoon players are S rank?
A: The percentage of Splatoon players who are S rank is not officially published; community estimates vary by season, typically around 3–8% depending on region, mode, and seasonal rank inflation.
Q: Does Splatoon 3 have LGBTQ?
A: Splatoon 3 includes LGBTQ representation through gender-neutral customization and inclusive character designs; Nintendo doesn’t label orientations explicitly, but the game and community embrace diverse identities.
Q: Is Splatoon better with or without motion controls?
A: Splatoon is generally better with motion controls for faster, precise aiming; many competitive players prefer gyro, though stick-only works—try both and pick what gives you consistent accuracy.
Q: What is higher than S+ rank?
A: X rank is higher than S+; reaching X means you passed S+ promotion and joined the top competitive tier reserved for the best players.