


Think you can brute-force Leyndell’s bosses with higher levels? Not really.
Leyndell Royal Capital forces two mandatory fights that punish greedy play.
This walkthrough gives a clear plan for Godfrey and Morgott, from opener timing to phase-two fixes.
You’ll get quick-start rules, build picks (Bleed, Frost, or poise Strength), best summons, and what to do when things go wrong.
Follow the decision rules here and you’ll save tries and time, whether you’re level 90 or pushing through earlier with a +15/+6 weapon.
Quick-Start Boss Strategy (Don’t Bury the Lede)
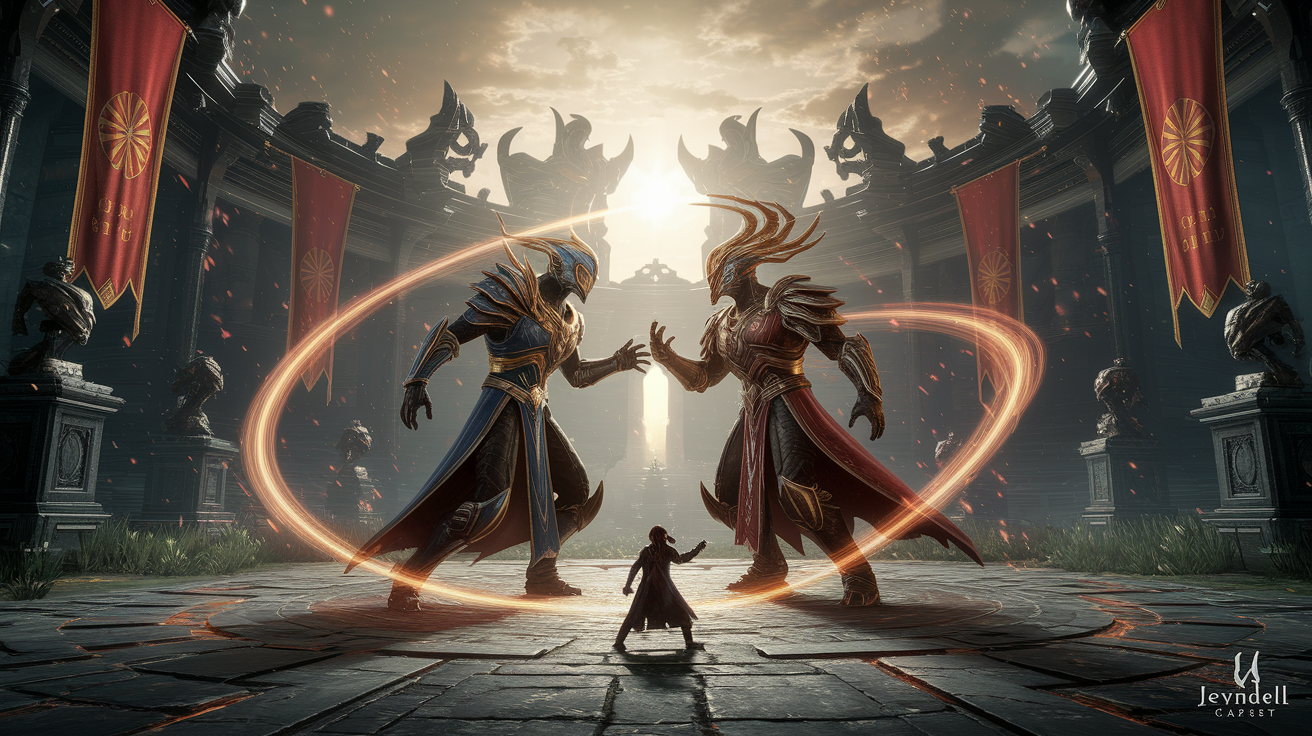
Leyndell houses two mandatory bosses, and both hit harder than anything you’ve faced in Limgrave or Liurnia. Godfrey, First Elden Lord uses heavy axe slams and shockwaves that punish greedy attacks. Morgott, the Omen King follows with fast holy combos and phase two AoE explosions.
Most players tackle Leyndell at level 90 to 100, though you can push through earlier if your weapon’s at +15 standard or +6 somber. Bleed and Frost builds perform well against both bosses because they proc fast and interrupt attack chains. High poise Strength builds work too, but you need stamina management and medium armor to stay mobile.
Before either fight, stack buffs. Flame Grant Me Strength boosts physical damage for 30 seconds and Golden Vow adds another damage and defense layer. Both buffs stack and let you trade hits more safely. Use a Spirit Ash that can tank or distract. The Mimic Tear’s ideal if you have the HP flask charges to spare. For Morgott specifically, holy resistance makes the difference between a two shot and a three shot, so grab the Haligdrake Talisman or pop a Holyproof Dried Liver before the fog gate.
- Level 90 minimum with a +15 or +6 weapon for reasonable damage.
- Bleed or Frost proc fast and stagger both bosses mid combo.
- Flame Grant Me Strength + Golden Vow stack for maximum damage output.
- Mimic Tear or tanky Spirit Ash pulls aggro and buys punish windows.
- Haligdrake Talisman or Holyproof Dried Liver cuts Morgott’s holy damage by 20 to 35 percent.
- Jump attacks punish Godfrey’s axe recovery and Morgott’s dagger delays.
- Medium roll or better is mandatory. Morgott’s phase two will kill you if you fat roll.
- Furlcalling Finger Remedy lets you summon Melina for Morgott if you want extra help.
Preparing for the Godfrey, First Elden Lord Fight
Godfrey’s axe slams hit through shields and his shockwaves cover half the arena, so preparation matters more than gear quality. Arrive at level 90 or higher with at least 35 Vigor. If you’re running 25 or 30 Vigor, his grab in phase two will one shot you and phase one stomps will two shot.
Medium armor with decent physical negation works best. The Bull Goat set’s overkill and will force a fat roll unless you stack Endurance. Aim for around 50 to 60 poise so light attacks don’t stagger you mid punish. Bleed builds can proc hemorrhage two or three times per phase if you stay aggressive, and each proc takes a chunk of his health bar. Frost works similarly but requires a weapon that applies it quickly. Dual Cold Uchigatanas or a Cold infused Claymore both perform well.
Bring the Dragoncrest Greatshield Talisman to cut physical damage by 20 percent, and pair it with the Green Turtle Talisman for faster stamina recovery. Godfrey punishes stamina mistakes harder than most bosses because his combos force multiple rolls in a row. If you run out of stamina mid chain, you eat the final hit.
Consumables are optional but useful. A Rune Arc with Godrick’s Great Rune adds five levels to every stat, which translates to more HP, more stamina, and slightly higher damage. Exalted Flesh boosts all damage types for 30 seconds. Stack it with Flame Grant Me Strength if you’re using a physical build.
Spirit Ashes make the fight significantly easier. The Mimic Tear copies your build and can proc Bleed or Frost as fast as you can. If you haven’t upgraded your Mimic, the Banished Knight Oleg or Lhutel the Headless both tank well and create consistent openings. Don’t use squishy ashes like the Jellyfish. Godfrey’s AoE stomps will kill them in phase one.
Save your Flask of Wondrous Physick for phase two when his grab attacks start. Mix the Stonebarb Cracked Tear for extra poise damage and the Thorny Cracked Tear to proc a second Bleed faster if you’re running that build.
Godfrey Boss Fight Walkthrough: Phase 1

Godfrey opens every attempt with a jump that covers the entire arena. As soon as you pass the fog gate, sprint forward and roll when he lands. The axe stays embedded in the ground for a second, giving you a free opening for one or two hits.
After the opening jump, he cycles through three main attacks. His vertical axe slam drives the weapon into the ground and creates a forward shockwave. Roll toward him just before the axe hits, not when he lifts it. The shockwave travels in a cone so side rolls don’t work reliably.
His second common move is a foot stomp that sends out a linear shockwave. Watch his leg. When he lifts his foot, dodge perpendicular to the direction he’s facing. The third pattern is a horizontal sweep with the axe. This one has a long windup and he drags the weapon across the ground. Jump over the sweep or roll through it toward his left side, then punish with jump attacks.
Phase one is all about patience. Godfrey’s attacks have long recoveries but short openings. After his vertical slam, you get about two seconds before he pulls the axe out. Use that window for charged heavies or one full jump attack. After his stomp, he usually follows with a second stomp or a sweep, so hit once and reset your spacing.
Don’t chase him across the arena. Let him come to you, dodge the opener, land your punish, then back off. If you’re using a Spirit Ash, it’ll pull aggro for a few seconds. When he turns away, sprint in and apply pressure with fast attacks or status buildup. Bleed will proc around 30 percent health in phase one if you stay consistent.
- Sprint forward immediately after entering the fog gate and roll when Godfrey lands from his jump.
- After his vertical axe slam, roll toward him to avoid the shockwave, then punish with one or two hits.
- When he lifts his foot for a stomp, dodge perpendicular to his facing direction and prepare for a follow up.
- Jump over his horizontal axe sweep or roll through it toward his left, then land a jump attack.
- Let your Spirit Ash pull aggro, then sprint in for fast combos when his back is turned.
- Stay patient, only punish after slams and stomps, and avoid chasing him across the arena.
Godfrey Boss Fight Walkthrough: Phase 2 (Warrior Form)

When Godfrey hits roughly 50 percent health, he drops the axe and transitions into Hoarah Loux, his warrior form. The arena shakes and he roars, giving you a few seconds to heal or rebuff. Phase two introduces grabs, ground slams, and berserk charge attacks that deal massive poise damage.
His most dangerous move is the grab combo. He lunges forward with both arms extended. If he catches you, he slams you into the ground multiple times and follows with a shockwave that hits your Spirit Ash if it’s nearby. The grab has deceptive range, so don’t roll backward. Roll to the side at the last possible moment, right when his hands are about to close. If you roll too early, the tracking will catch you mid animation.
His second new attack is a leaping ground slam. Godfrey jumps high into the air and crashes down with both fists, creating a circular AoE shockwave. This move one shots players below 1,200 HP. As soon as he jumps, start sprinting away from the center. The shockwave has a two second delay after impact, so if you’re outside the initial radius, you’re safe.
Don’t try to roll the impact. The timing’s inconsistent and you’ll get clipped. After the slam, Godfrey stays on the ground for about three seconds. That’s your longest punish window in phase two. Use it for charged attacks or full weapon art combos.
The third new mechanic is his berserk charge. Godfrey sprints toward you and throws rapid punches, then finishes with an uppercut that launches you into the air. The charge tracks moderately well, so backpedaling doesn’t work. Instead, wait until he’s two steps away, then roll diagonally through the first punch. The rest of the combo will whiff and you can punish from behind.
If you’re using a heavy weapon, one fully charged R2 will stagger him if you’ve been applying poise damage consistently. Bleed and Frost both proc faster in phase two because his resistance drops slightly after the transition. If you proc Bleed once before phase two and once after, the fight becomes significantly shorter.
Best Summons, Counters, and Builds for Godfrey

Mimic Tear’s the best summon for Godfrey if you’re running a Bleed, Frost, or high damage Strength build. It copies your entire loadout, including buffs, so if you activate Flame Grant Me Strength before summoning, your Mimic gets the buff too. The Mimic can proc Bleed as fast as you can, which means you can stack two or three hemorrhage procs per phase if you both stay aggressive.
If your Mimic dies early, switch to the Banished Knight Oleg. Oleg has high poise and can tank multiple stomps without folding. Lhutel the Headless works similarly but teleports around the arena, which sometimes confuses Godfrey’s targeting and gives you free openings.
- Bleed builds using dual Uchigatanas, Rivers of Blood, or any fast weapon with Seppuku proc hemorrhage every 10 to 15 hits and cut fight time in half.
- Frost builds with Cold infused Claymores or dual Cold Curved Swords slow Godfrey’s attacks and reduce his damage output after the first proc.
- High Poise Strength builds with Colossal weapons can trade hits during his recovery windows and stagger him faster with jump attacks.
- Mimic Tear +10 copies your build and doubles your Bleed or Frost application, making phase two significantly shorter.
- Dragoncrest Greatshield Talisman reduces all physical damage by 20 percent, which turns two shots into three shots and gives you more room for mistakes.
Rewards for Defeating Godfrey

| Item | Description |
|---|---|
| Talisman Pouch | Increases your maximum equipped talismans by one slot, letting you run four talismans total after defeating Godfrey. |
| 80,000 Runes | Enough to level up two or three times at level 90, or purchase upgrade materials and consumables before Morgott. |
| Remembrance of Hoarah Loux | Trade at Enia in Roundtable Hold for the Axe of Godfrey (Colossal weapon) or the Ash of War: Hoarah Loux’s Earthshaker. |
| Access to Erdtree Sanctuary | Unlocks the route to Queen’s Bedchamber and the final Leyndell boss, Morgott, the Omen King. |
Preparing for the Morgott, the Omen King Fight
Morgott deals pure holy damage with most of his attacks, so physical defense becomes secondary to holy resistance. The Haligdrake Talisman increases holy damage negation by 13 percent at +1 and 17 percent at +2. Stack it with a Holyproof Dried Liver, which adds another 35 percent holy negation for three minutes. Together, these two items reduce Morgott’s damage output by nearly 50 percent, turning his two shot combos into three or four hits.
If you don’t have the Haligdrake Talisman, grab it from the Stormveil Castle rooftops or the Leyndell sewers before the fight. Morgott’s holy daggers and AoE explosions become significantly less threatening when your negation’s stacked.
Mobility’s more important against Morgott than raw defense. His phase one combos chain fast and his phase two holy explosions cover large areas, so you need a medium roll or better to dodge consistently. If you’re wearing heavy armor, drop pieces until your equip load is below 70 percent.
Vigor should be at least 40 by this fight. Morgott’s delayed thrust attack deals around 800 damage to medium armor builds with 35 Vigor, and his phase two hammer slam can one shot players below 1,000 HP. Level Vigor to 45 if you’re struggling to survive his combos.
Bleed’s again the best option for damage. Morgott’s vulnerable to hemorrhage and each proc removes 10 to 15 percent of his health bar. Frost works but takes longer to apply because his resistance is slightly higher.
Bring the same Spirit Ash you used for Godfrey. Mimic Tear’s still the best choice, but if you want extra help, you can summon Melina using a Furlcalling Finger Remedy. Melina appears as a gold summon sign just outside the fog gate after you rest at Queen’s Bedchamber. She can tank a few hits and applies consistent pressure, though she doesn’t survive phase two if Morgott targets her.
Save your Flask of Wondrous Physick for phase two. Mix the Crimsonwhorl Bubbletear to negate one holy attack completely, which can save you from his hammer slam or dagger volley. Pair it with the Strength Knot Crystal Tear or Stonebarb Cracked Tear depending on your build.
Morgott Boss Fight Walkthrough: Phase 1

Morgott opens phase one with a fast sword rush. He sprints toward you and swings his curved sword in a three hit combo, then follows with a delayed downward thrust. The thrust has a long windup where he holds the sword above his head. Wait until the sword starts moving down, then roll diagonally forward and to the left. If you roll too early, the tracking will catch you.
After the thrust, he pauses for about one second. That’s your punish window. Use fast attacks or one charged heavy, then back off before he starts his next combo.
His second common attack is a holy dagger throw. Morgott summons glowing daggers and hurls them in a horizontal spread. The daggers track moderately well, so rolling perpendicular to the throw works better than rolling backward. After the throw, he usually follows with a melee rush, so don’t overcommit to punishes.
Phase one’s about reading delays. Morgott mixes fast attacks with slow, delayed strikes to bait early rolls. His overhead sword slam looks like it’s going to land immediately, but he holds it for an extra half second. If you roll when he lifts the sword, you’ll get hit during your recovery.
Instead, watch his arms. When his arms start moving down, that’s when you roll. His tail swipe is another delayed move. He winds up and swings his tail in a wide arc. The swipe covers about 180 degrees, so don’t try to circle around him. Jump over the tail or roll through it toward his right side, then punish with a jump attack. Morgott’s combos usually end after three or four hits, so count the attacks and prepare to punish after the final strike.
- Roll diagonally forward and left when Morgott’s delayed thrust animation starts moving downward, not when he lifts the sword.
- After his three hit sword combo, wait for the thrust follow up, dodge it, then punish with one or two fast attacks.
- When he throws holy daggers, roll perpendicular to the spread and prepare for an immediate melee rush.
- Jump over his tail swipe or roll through it toward his right side, then land a jump attack during his recovery.
- Count his combo hits and only punish after the final strike to avoid getting clipped by follow ups.
Morgott Boss Fight Walkthrough: Phase 2

Morgott transitions to phase two at roughly 60 percent health. He leaps into the air and slams down with a massive holy AoE explosion that covers the center of the arena. As soon as he jumps, sprint to the edge of the arena. The explosion has a two second delay, so if you’re far enough away, you won’t get hit.
After the slam, Morgott adds a holy hammer and spear to his moveset. The hammer slam is his most dangerous new attack. He lifts a giant golden hammer above his head and crashes it down, creating a second AoE explosion. The hammer has better tracking than his sword, so you need to roll at the last possible moment. Roll toward him, not away. If you roll backward, the AoE will clip you during your recovery.
His second new move is a multi weapon combo. Morgott cycles between his sword, spear, and daggers in rapid succession. The combo can chain for six or seven hits and each strike comes from a different angle. Don’t try to dodge every hit individually. Instead, roll twice to create distance, then wait for the combo to end.
After the final strike, he pauses for about two seconds. That’s your longest punish window in phase two. Use it for charged attacks, weapon arts, or a full jump attack combo. If you’re using Bleed, this is where you proc hemorrhage for the second or third time. Each proc staggers him briefly and gives you another free opening.
Phase two also introduces a holy dagger rain. Morgott summons a cloud of daggers above his head and they fall in a wide area. The daggers don’t track, so as long as you keep moving, they won’t hit you. Sprint in a circular pattern around the arena until the daggers stop falling, then close the distance and punish.
His spear thrust is faster than his sword thrust but deals less damage. He lunges forward with the spear extended. Roll to the side at the last second, then punish from behind.
Morgott’s phase two combos are longer and more aggressive, but his openings are also bigger. If you stay patient and only punish after his longest attacks, the phase becomes manageable. Don’t panic roll. Wait for the delays, dodge once, and commit to your punish.
Best Summons, Counters, and Builds for Morgott

Mimic Tear’s again the strongest summon for Morgott. It can proc Bleed as fast as you can and survives most of phase one if you upgraded it to +10. If your Mimic dies early in phase two, it still bought you enough time to apply pressure and build up hemorrhage.
The Banished Knight Oleg is the second best option. Oleg has high poise and can tank Morgott’s sword combos without staggering. Lhutel the Headless works well if you want a distraction, but her teleports sometimes cause Morgott to switch targets mid combo, which can mess up your punish timing.
If you want NPC help, summon Melina using the gold sign outside the fog gate. She doesn’t deal massive damage but she pulls aggro and gives you more openings.
- Bleed builds with dual Uchigatanas, Rivers of Blood, or Eleonora’s Poleblade proc hemorrhage two or three times per fight and cut Morgott’s health bar in half.
- Holy resistance stacking using the Haligdrake Talisman +2 and Holyproof Dried Liver reduces Morgott’s damage by nearly 50 percent and turns his two shots into survivable hits.
- High Vigor builds with 45 or more Vigor survive his phase two hammer slam and dagger rain without using all your flasks.
- Mimic Tear +10 copies your Bleed build and doubles your hemorrhage application, making phase two significantly shorter.
- Medium roll is mandatory for phase two. If you’re fat rolling, Morgott’s delayed attacks and AoE explosions will kill you before you can react.
Rewards for Defeating Morgott
| Item | Description |
|---|---|
| Morgott’s Great Rune | Increases maximum HP significantly when activated at a Divine Tower, one of the strongest Great Runes for survivability builds. |
| 90,000 Runes | Enough to level up three or four times at level 100, or stock up on upgrade materials and consumables for the Mountaintops. |
| Remembrance of the Omen King | Trade at Enia in Roundtable Hold for Morgott’s Cursed Sword (Curved Greatsword) or the Regal Omen Bairn (reusable item). |
| Access to Forbidden Lands and Mountaintops | After resting at the Elden Throne, Melina gives you the Rold Medallion, unlocking the lift to the Mountaintops of the Giants and progression toward the endgame. |
Final Words
You sprint into Leyndell as Godfrey lands a shockwave and Morgott tests your timing.
Keep level near 90–100+, use Bleed, Frost, or high‑poise Strength builds, and pop Flame Grant Me Strength or Golden Vow. Bring Mimic Tear or sturdy ashes, and equip Holyproof Dried Liver for Morgott. Stagger Godfrey, bait his grabs, and dodge Morgott’s thrusts and holy AoE.
Use this Elden Ring Leyndell Royal Capital boss fight walkthrough as your quick reference. Stay calm and adapt—you’ll clear it.
FAQ
Q: What level should you be at Leyndell, Royal Capital?
A: The level you should be at Leyndell, Royal Capital is typically 90–100+ for a smooth run; you can manage lower levels with strong summons, co-op, ranged cheese, or powerful status builds.
Q: Which boss to fight first in Leyndell?
A: The boss to fight first in Leyndell is Godfrey, the First Elden Lord; defeating him opens progression, and Morgott is more mobile and usually tackled after you gear up.
Q: What is the best weapon for Leyndell?
A: The best weapon for Leyndell is one that fits your build: bleed or frost weapons for status damage, or a high-poise heavy strength weapon to stagger bosses; keep a fast secondary for openings.
Q: How to get past Leyndell?
A: To get past Leyndell, Royal Capital you should be level-appropriate, beat Godfrey then Morgott, use Mimic Tear or co-op, apply Flame Grant Me Strength and Golden Vow, and equip holy resistance for Morgott.