
Why grind mid-tier guns when one smart blueprint run gets you S-tier power from the start?
This quick guide breaks starter weapon tiers for new players and points to exact vendor, quest, and blueprint locations so you don’t waste time or upgrade materials.
You’ll learn which weapons to prioritize, the safest routes to extract them, and simple swap rules when a “good” drop isn’t worth your slots.
Follow the fastest low-risk routes first; vendor buys and short quests are your fallback.
Early-Game Weapon Tier Breakdown With Fast Locations
Starter weapons fall into a clear hierarchy. S-tier weapons deliver the best damage, tightest control, or strongest unique effects and stay competitive deep into your run. A-tier weapons perform well across most scenarios and don’t require insane effort to get. B-tier weapons fill niche roles or specific playstyles. C-tier weapons work but get outclassed fast. D-tier weapons? They’re a waste of time.
Quality prefixes matter just as much as the base weapon. A Refined or Advanced standard rifle will often beat unique weapons stuck at Regular rarity. If you spot a weapon tagged Calibrated, Refined, or Advanced, grab it. Those prefixes stack baseline stat improvements on top of what the weapon already does. Regular uniques feel special early on, but they fall off hard once you start finding Refined drops from higher-tier zones.
The fastest way to build power is targeting S-tier gear with low-risk routes. Don’t grind mid-tier drops hoping something better shows up. Go straight for the best early options using vendor buys, short quests, or safe blueprint runs. When you prioritize smart, you skip entire tiers of mediocre gear and don’t burn upgrade materials on stuff you’ll replace anyway.
| Tier | Weapon Example | Why It’s Strong Early | Basic Location Method |
|---|---|---|---|
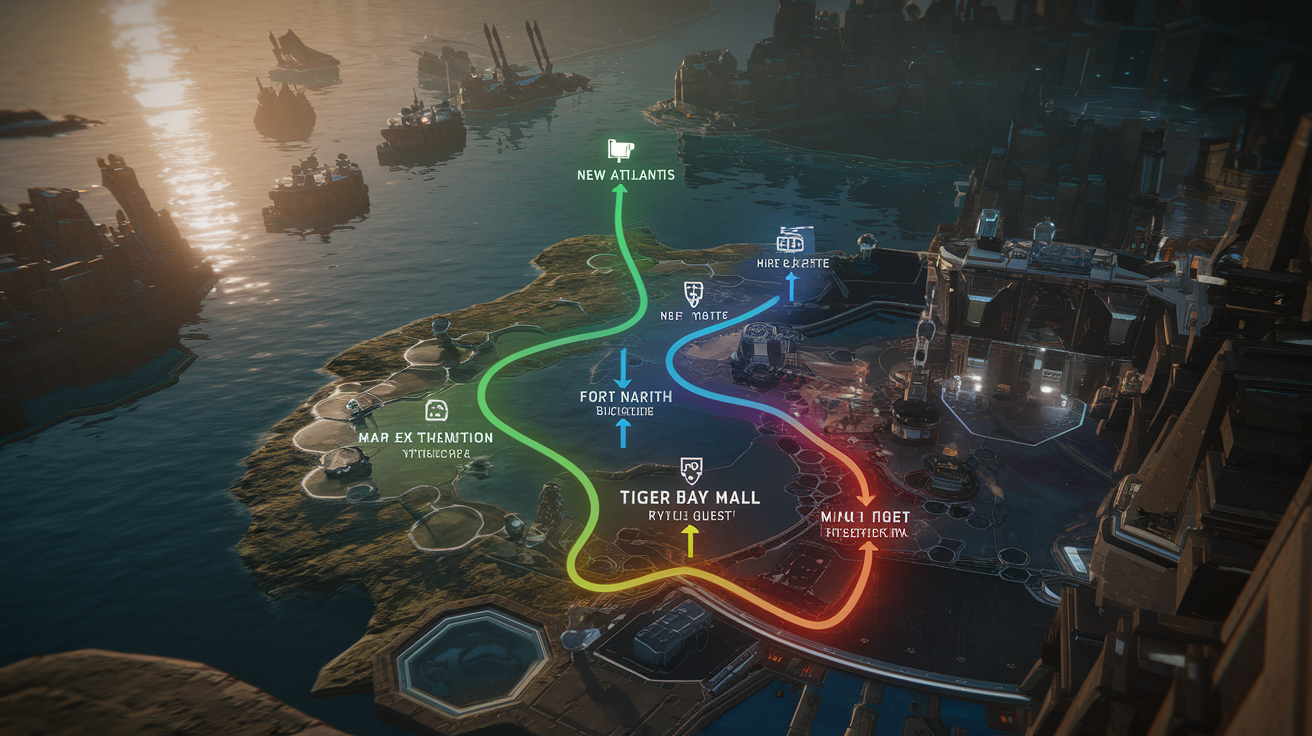
| S | DDM4, Soul Split Katana, Revenant | Highest damage or best control; scales into late-game without replacement | Blueprint extraction (Fort Narith), questline reward (Crimson Fleet), progression farming |
| A | Marksman’s AA-99, AK-308, Mantis Edge | Excellent damage and utility; easy to acquire; solid carry-through weapon | Vendor purchase (New Atlantis), blueprint extraction (Fort Narith Jail), early progression upgrade |
| B | Ember, Viper 1911, Despondent Assassin | Solid niche performance (stealth, burn effect, long-range); situational utility | Quest reward (Ryuji chain, Defensive Measures), multi-step questline (Pha Lang Airfield) |
| C | Unfair Advantage, early shotguns | Fun unique effects but inconsistent; falls off against armored targets | Rare drop (kill Command Ikande), early zone chest farming |
| D | Grade 2 weapons, Emperial Sword | Mediocre stats; grinding them delays better acquisitions | Random chest drops, low-tier vendor stock |
| Unique Situational | SVD Dragunov, Blood Scythe | High-risk acquisition but strong payoff; used to farm end-tier weapons | High-threat zone extraction (Tiger Bay Mall), Grade 1 progression unlock |
Starter Weapon Locations and Exact Acquisition Methods
Starter weapon acquisition breaks into four categories. Vendor purchases are the safest, fastest path if you’ve got the credits. Quest rewards guarantee specific weapons but lock you into story or faction choices. Blueprint extractions require you to survive hostile zones, extract with the item, and turn it in for permanent vendor access. Chest and corpse drops are unreliable and waste time unless you’re already clearing that zone for something else.
Low-risk vendor routes start in New Atlantis on Jemison. Head to the Residential District and find Centurian Arsenal. The Marksman’s AA-99 sits in their inventory with decent damage, a built-in short scope, and a suppressor. You walk in, buy it, and leave. No combat, no keys, no risk. This is your fallback when every other route feels too dangerous or you need firepower right now.
Blueprint extraction routes need prep. DDM4 and AK-308 both start at Delta 3 near Fort Narith. For the DDM4, approach from the hill overlooking the base, scout guard towers, then clear the barracks building room by room. The blueprint spawns on tables upstairs. Extract immediately and turn it in to Gunny for permanent unlock. The AK-308 blueprint sits inside Fort Narith Jail on the west side. Clear enemies from the hill, sweep the jail interior, grab the blueprint or magazine item, and get out. Both runs share the same spawn but split at the base.
High-risk routes pay off with top-tier weapons but punish mistakes hard. The SVD Dragunov route starts at Juliet 2, then moves along tree lines toward Tiger Bay Mall. Enter through the wrecking yard gap on the side or back, move shop to shop toward the bookstore, and grab the item from the back room. Many enemies around the wrecking yard and mall entrances carry the TB-Mall-Key if the backroom’s locked. Speed matters more than being thorough here. Extract as soon as you’ve got the item because reinforcements spawn fast and greedy looting ends most runs.
- Delta 3 to DDM4: Land Delta 3, hill approach to Fort Narith, clear barracks second building, blueprint upstairs on tables, extract and turn in to Gunny.
- Delta 3 to AK-308: Land Delta 3, west hill path to Fort Narith Jail, sweep jail rooms, grab blueprint/magazine, extract.
- Juliet 2 to SVD: Land Juliet 2, tree line movement to Tiger Bay Mall, wrecking yard gap entry, bookstore backroom item (TB-Mall-Key if locked), fast extract.
- New Atlantis to AA-99: Jemison system, New Atlantis spaceport, Residential District, Centurian Arsenal vendor, buy it outright.
- Neon to Ember: Start Ryuji questline on Neon, progress to “Top Secret” quest, meet contact on Cydonia, accept kill favor, travel to Saturn, eliminate target, receive Ember reward.
- Defensive Measures questline to Despondent Assassin: Complete full quest chain starting with Defensive Measures mission, receive rifle as final reward.
Comparing Starter Weapon Stats (Damage, Speed, Range, Mod Slots)
Damage profiles split into raw per-shot output and sustained DPS over time. High per-shot weapons like the SVD and Despondent Assassin work best at long range where you fire, reposition, and fire again. Sustained DPS weapons like the DDM4 and AK-308 perform better in extended firefights where recoil control and magazine size let you stay on target without reloading. Early viability depends more on controlling recoil and landing follow-up shots than chasing the highest listed damage number.
Range and recoil separate good starter weapons from mediocre ones. The AK-308 uses 7.62 NATO rounds with better muzzle velocity and armor penetration compared to lighter calibers. It works as a marksman rifle with the right setup and stays relevant into late-game because penetration scales better than raw damage once enemies start wearing armor. The SVD offers sniper-level ballistics with higher fire rate and magazine capacity than bolt-action alternatives like the Mosin-Nagant or M700. The DDM4 balances high accuracy with strong recoil control and accepts a wide range of attachments for tuning.
Mod slots determine how far you can push a weapon’s performance. The AA-99 ships with mods already installed, including a short scope and suppressor, which saves you materials and lets you fight effectively right away. The Despondent Assassin has limited mod slots, which caps its upgrade ceiling. Unique weapons with built-in effects like Ember’s ignite or Revenant’s bleed can’t modify those effects, but you can still tune optics, grips, and barrels. If a weapon accepts silencers and variable scopes, it stays flexible across different combat ranges and stealth scenarios.
- Bleed effect: Revenant’s Lacerate perk applies damage-over-time ticks. Strong against high-HP targets that take multiple shots to drop.
- Ignite effect: Ember’s random burn chance stacks tick damage. Entertaining against groups but inconsistent for single-target DPS.
- Demoralize effect: Unfair Advantage’s Radioactive perk and Despondent Assassin’s Demoralizing perk reduce enemy aggression. Useful for breaking enemy formations.
- Radiation damage: Unfair Advantage applies random radiation bursts. Niche utility, not a primary DPS mechanic.
- Armor-penetrating rounds: 7.62 caliber (AK-308, M14A1) punches through armor more effectively than lighter rounds. Critical for mid to late progression when enemies upgrade gear.
Starter Weapon Farming Routes and Efficient Run Planning

Safe pathing starts with elevation and sightlines. Use hills and tree lines to scout enemy positions before committing to an approach. The Fort Narith routes benefit from the west-side hill overlooking the base and jail. From there you can count guards, spot patrols, and pick off stationary targets at range before entering buildings. Rushing the barracks or jail interior is the most common death cause. Clear methodically, check windows, and listen for footsteps that signal respawns or reinforcements you missed on the first sweep.
Greedy looting kills more players than direct combat. Once you’ve got the blueprint or key item, your only job is to extract. Don’t sweep extra rooms for ammo. Don’t chase loot crates in side hallways. Every second you stay in the zone after acquiring your target increases the chance of reinforcements, late spawns, or another player intercepting your exit. One clean successful extraction beats ten runs that end in death because you tried to fill your inventory.
- Land at the designated spawn point and immediately orient toward your target zone using landmarks or compass bearings.
- Scout from elevation or cover before entering the main objective area. Count enemies, identify patrol routes, and clear snipers or overwatch positions first.
- Clear the objective building room by room with controlled movement. Avoid sprinting through doorways and always check corners and upper floors.
- Grab the blueprint, key item, or quest objective as soon as it’s accessible. Do not detour for secondary loot.
- Immediately secure your exit path by clearing the route back to your extraction point or vehicle. Most deaths happen during exit when players assume the area’s still clear.
- Extract with minimal gear and turn in your objective. Resist the urge to farm additional zones on the same run.
Beginner-Friendly Starter Loadouts and Class/Playstyle Recommendations

Solo players should prioritize self-sufficient weapons with good damage and controllable recoil. The AA-99 covers most early scenarios without demanding advanced positioning or team coordination. It ships with a suppressor for optional stealth, decent mid-range accuracy, and enough firepower to handle standard enemies in one or two bursts. If you’re running solo and need one reliable weapon to carry you through early zones, buy the AA-99 first and worry about specialized tools later.
Group players benefit from role specialization. One player should carry long-range precision like the SVD or AK-308 configured as a DMR to control sightlines and suppress distant threats. Another player can run close-range clear tools like shotguns for indoor sweeps, though shotguns fall off hard against armored opponents. A third player focused on support or objective running should carry the lightest effective weapon, like the Viper 1911, to maintain mobility and fast repositioning when the team needs to extract under pressure.
Stealth builds revolve around suppressed weapons and minimal engagement. The Viper 1911 is a suppressed pistol unlocked through the Pha Lang Airfield quest chain. It pairs well with the AA-99’s suppressor for a two-weapon stealth loadout that covers close and mid-range without breaking concealment. Avoid high-caliber unsuppressed rifles when running stealth because the sound profile draws reinforcements and alerts distant patrols. Night runs combined with suppressed weapons reduce active engagements on high-risk zones like Tiger Bay Mall.
- Pick the AA-99 if you want a safe, vendor-purchased weapon that works in every scenario and requires no risk to acquire.
- Pick the DDM4 if you can handle one blueprint extraction run and want the best all-around rifle for early to mid progression.
- Pick the AK-308 if you’re facing armored enemies or need a weapon that scales into late-game with 7.62 penetration and long-range accuracy.
- Pick the Viper 1911 if you prefer quest-based unlocks and want a reliable stealth sidearm without gambling on high-risk extraction zones.
- Pick the Soul Split Katana as your progression goal if you’re running melee builds. Use Mantis Edge early, upgrade to Blood Scythe or Frost Fangs, then farm SSK as your end-state weapon.
Starter Weapon Upgrade Paths, Rarities, and Materials

Weapon rarity tiers follow a clear progression hierarchy. Regular weapons have no prefix and represent baseline stats. Calibrated weapons add the first tier of stat improvements across damage, accuracy, or handling. Refined weapons push those stats higher and often unlock additional mod slots or attachment compatibility. Advanced weapons sit at the top of the world-drop rarity scale and frequently outperform unique weapons that are locked at Regular rarity. When you find a Refined or Advanced drop, compare it directly to your current unique. The unique’s special effect might not make up for a 20 percent damage gap and better recoil.
Upgrade systems vary by weapon type and acquisition method. Vendor-purchased weapons like the AA-99 arrive with mods already installed, which saves crafting materials early when resources are tight. Quest-reward weapons like the Despondent Assassin and Ember have fixed mod slot counts that limit how much you can tune them. Blueprint-unlocked weapons become available for repeat purchase at different rarity tiers once you progress further and unlock higher-quality crafting or vendor stock. Unique effects like Revenant’s bleed or Ember’s ignite can’t be modded or transferred, so those weapons are locked into their intended role.
Stop upgrading a starter weapon when the material cost exceeds the value of simply replacing it. If you’re dumping rare materials into a Regular-tier unique and you just found a Refined standard rifle with comparable damage, stop the upgrade and swap. The Refined weapon will outscale your upgraded unique within a few levels. Early weapons like the AA-99 and DDM4 stay viable longer because their baseline stats and mod flexibility let them adapt to different combat ranges and enemy armor levels without constant material investment.
When to Replace Starter Weapons and Transition Into Mid-Game Gear

Starter weapon lifespan depends on rarity tier and caliber choice more than weapon type. Weapons using 7.62 rounds like the AK-308, SVD, and M14A1 scale better into mid-game because armor penetration becomes critical when enemies start wearing higher-tier gear. Lighter calibers lose effectiveness faster unless you’re landing consistent headshots or exploiting weak points. The AA-99 stays competitive longer than expected because its built-in mods and solid accuracy let you adapt to tougher fights without needing immediate replacement.
Unique pistols and niche weapons transition into situational backup roles. Ember and Unfair Advantage feel strong early when their unique effects provide tactical variety, but sustained DPS and armor penetration matter more in prolonged firefights. Keep them in quick slots for specific encounters where the ignite or radiation effect provides value, but don’t rely on them as primary weapons once you’re clearing zones with heavily armored patrols. The Viper 1911 maintains utility as a stealth sidearm regardless of progression stage because suppressed pistols always have a role.
- Replace when enemy armor negates your damage: If you’re landing center-mass shots and enemies aren’t dropping in reasonable time, your caliber or penetration stat is too low.
- Replace when you hit the weapon’s mod-slot cap: If you’ve installed every available upgrade and the weapon still underperforms compared to unmodded higher-tier drops, you’ve maxed its potential.
- Replace when ammo efficiency drops: If you’re burning through magazines to finish encounters that better weapons handle in half the ammo, the resource cost outweighs the weapon’s remaining utility.
Complete Starter Weapon Checklist and Early Progress Roadmap
Your first priority is securing one reliable primary weapon within the first few hours. Either buy the AA-99 from the vendor or run the DDM4 blueprint extraction at Fort Narith. Both paths give you a weapon strong enough to handle early to mid progression without constant upgrades. Once you have that foundation, focus on acquiring a long-range option like the AK-308 or SVD to cover different engagement distances.
- Acquire one vendor-purchased or low-risk blueprint weapon (AA-99 or DDM4) within your first session.
- Unlock a 7.62 caliber weapon (AK-308, M14A1, or SVD) for armor penetration and long-range capability.
- Complete at least one questline weapon (Ember, Despondent Assassin, or Viper 1911) for tactical variety.
- Prioritize Refined or Advanced drops over Regular-tier uniques once you start finding higher-quality world loot.
- Keep one suppressed weapon (Viper 1911 or AA-99 with suppressor) for stealth runs and night farming.
- Avoid grinding Grade 2 or mid-tier weapons. Jump directly to Grade 1 options or top-tier blueprints.
- Plan blueprint runs with minimal loadouts to reduce risk and increase extraction consistency.
- Clear and secure your exit path before looting the objective item.
- Stop upgrading starter weapons when replacement drops outperform them at base stats.
- Track which questlines and faction choices lock or unlock specific weapons before committing to story decisions.
| Weapon | Method | Priority |
|---|---|---|
| DDM4 or AA-99 | Blueprint extraction (Fort Narith) or vendor purchase (New Atlantis) | First acquisition, foundation weapon for all early content |
| AK-308 or SVD | Blueprint extraction (Fort Narith Jail or Tiger Bay Mall) | Second acquisition, long-range and armor-penetration coverage |
| Viper 1911 or Ember | Quest reward (Pha Lang Airfield chain or Ryuji “Top Secret”) | Third acquisition, niche utility and tactical variety |
Final Words
In the action, we ran the early-game tier breakdown, exact pickup routes, stat comparisons, farming loops, loadout picks, upgrade paths, and the quick checklist.
Set one clear goal per run: grab S/A tier targets, use vendor or quest routes for safety, then repeat the fast farm loop. If a run breaks, reset and prioritize extraction over looting.
Use this as your quick reference for [game] starter weapon tiers and where to find them. Less guessing, more upgrades, better runs ahead.
FAQ
Q: What are tier 5 weapons?
A: Tier 5 weapons are top‑end, late‑game arms with superior stats, unique effects, and extra mod slots; they usually come from rare drops or quest rewards and suit high‑level, specialized builds.
Q: What is the best gun for a starter?
A: The best gun for a starter is the AA‑99 for reliable handling, solid damage, and vendor access; choose the DDM4 if you prefer long‑range control and can handle more recoil.
Q: What are the 18 types of weapons?
A: The 18 weapon types refer to categories like assault rifles, SMGs, pistols, shotguns, sniper rifles, LMGs, melee, thrown, energy, and special classes; the exact list varies by game system.
Q: What are level 4 weapons?
A: Level 4 weapons are mid‑tier gear with improved damage, extra mod slots, and higher rarity than base items; they bridge early and mid‑game but get outclassed by refined or unique gear.