
Think Vow of the Disciple is just another raid where the highest DPS wins?
It isn’t.
Four core systems—glyphs, obelisks, Knowledge, and Pervading Darkness—shape every encounter and punish sloppy teams.
This walkthrough breaks those systems down.
It assigns clear roles and gives quick decision rules you can use mid-raid.
You’ll get practical steps for Acquisitions, Caretaker, Exhibition, and Rhulk.
Plus loadout swaps and common fixes when things go wrong.
Read this and stop learning mechanics the hard way.
Understanding Core Mechanics and Systems

Before stepping into Vow of the Disciple, you need to understand four recurring systems that appear across every major encounter. These aren’t one-off puzzle gimmicks. They’re the foundation of the entire raid, and teams that ignore them spend hours wiping on mechanics they could’ve learned in ten minutes.
Glyphs are the visual language of the raid. There are nine symbols you’ll see throughout: Traveler, Pyramid, Darkness, Light, Give, Worship, Stop, Guardian, and Kill. Your fireteam must agree on names before you start. If one player calls a symbol “pyramid” and another calls it “triangle,” you’ll waste damage phases correcting callouts. Pull up a reference image, share it with your team, and lock in your naming system during orbit.
Obelisks are tall prisms covered in nine windows, each displaying one glyph. You’ll interact with obelisks in Acquisitions and the Rhulk fight. The important rule is speed. When you’re told to shoot three specific glyphs on an obelisk, you have seconds to do it correctly. Shooting the wrong glyph doesn’t just fail the mechanic, it accelerates failure states that wipe the team.
Knowledge is a buff you collect by killing specific enemies called Knowledge Bearers. It stacks three times: Heightened Knowledge, Brimming Knowledge, and Overflowing Knowledge. You deposit Knowledge to move objectives forward, like powering the payload in the opening section or locking obelisks during the Caretaker fight. The trick is coordination. If one player runs off with three stacks while the rest of the team has zero, you’re wasting time.
Pervading Darkness is the raid’s punishment for slow play. It’s a debuff that stacks to nine. When you hit ten stacks, you die instantly. No revive, no warning, just death. Pervading Darkness appears in four encounters: the Bog traverse, Caretaker, Exhibition, and Rhulk’s final stand. You clear stacks by standing near the payload barge, using the Aegis relic, or finishing certain phases quickly. If you’re sitting at eight or nine stacks, stop what you’re doing and fix it.
Recommended Weapons and Team Composition
Vow of the Disciple has two damage profiles. You need sustained add clear for long encounters like Exhibition, and you need burst damage for short windows on Caretaker and Rhulk. Trying to run the same loadout for both will leave you struggling.
For kinetic and energy slots, prioritize weapons that handle Champions and clear groups fast. Outbreak Perfected is strong across the entire raid because it never runs out of ammo and deals consistent damage to both adds and bosses when your Heavy is dry. Funnelweb with Subsistence and Frenzy shreds waves of Scorn and Taken in Exhibition. Gnawing Hunger or any adaptive Auto Rifle works if you don’t have Funnelweb. Witherhoard is excellent for area denial and passive damage, especially on Caretaker where you’re rotating between plates and clearing adds.
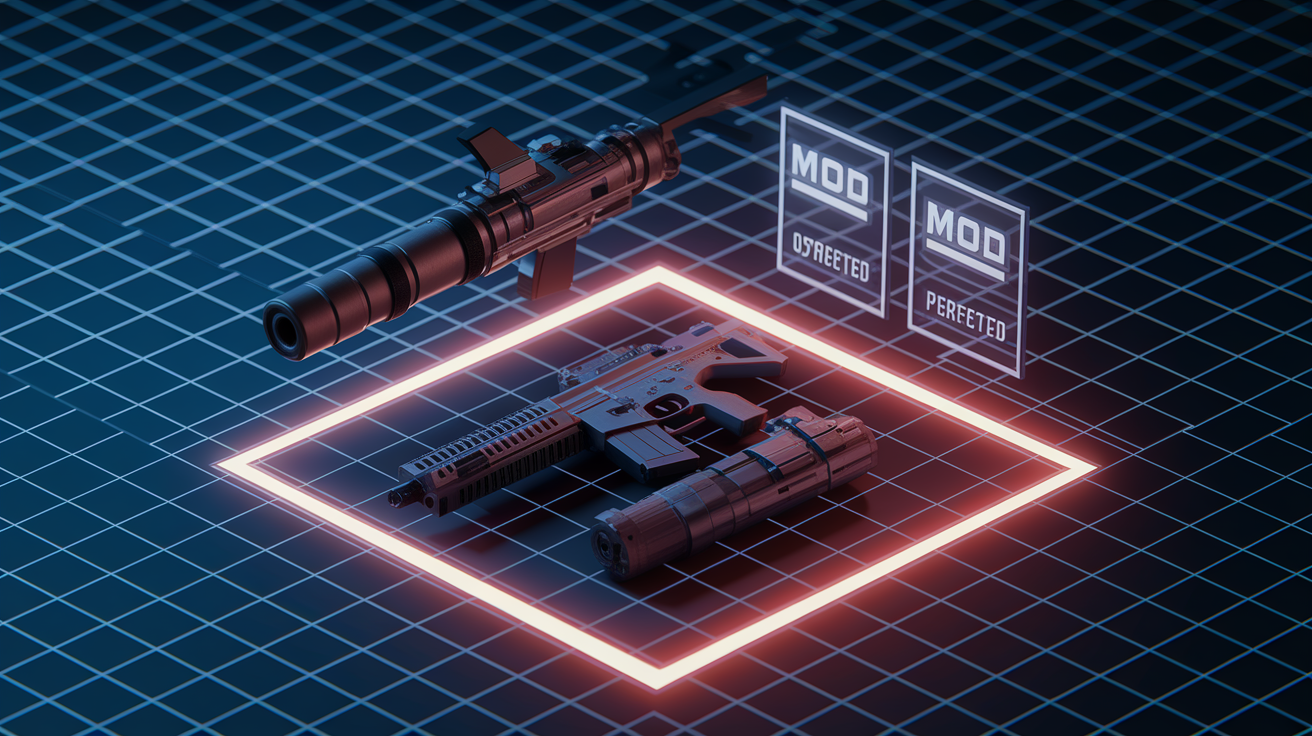
For Heavy, Gjallarhorn with the catalyst is the top choice for Caretaker and Rhulk. The Wolfpack Rounds buff other players’ rocket damage, so one Gjallarhorn on the team makes everyone’s rockets hit harder. Palmyra-B is the best legendary rocket to pair with Gjallarhorn, especially when crafted and leveled to 20. Sleeper Simulant and other Linear Fusion Rifles deal massive single-target damage and pair perfectly with Divinity. If one player runs Divinity to create a crit bubble on the boss, the rest of the team should use precision Heavy weapons. Deathbringer works in open spaces but struggles in tight arenas like the Caretaker floors.
For subclasses and Supers, one Well of Radiance is mandatory for damage phases. Pair it with Lunafaction Boots to speed up reloads. Titans should run Rally Barricade for the same reason. Bubble is less useful in this raid because damage phases happen on small plates where positioning matters. Hunters have flexibility. Moebius Quiver and Orpheus Rigs provide invisibility for revives and crowd control. Celestial Nighthawk with Golden Gun delivers huge burst damage during Rhulk’s final stand. Stasis subclasses work for freeze utility, but Void 3.0 with Devour and overshields is stronger for survival.
Champion mods are required. Unstoppable Champions spawn in Acquisitions. Overload Champions appear in Exhibition. If your team doesn’t slot the correct mods, you’ll spend minutes trying to kill a single champion while adds pile up and timers expire.
One final loadout note. Heavy ammo economy matters more in this raid than most. Caretaker has four floors with three damage windows each, and running dry on floor two means you’re using primary weapons when the boss has millions of health left. Coordinate who’s using ammo finders, who’s running scavenger mods, and when to switch from Heavy to Special or Primary damage.
Opening the Gate and Traversing the Bog

The raid starts with a quick combat check. You’ll face the Projection of Savathûn blocking the entrance to the pyramid. This fight has unlimited revives, so it’s low pressure. Burn her down with Heavy weapons. Gjallarhorn, Deathbringer, or Linear Fusion Rifles all work. Kill her, walk through the door, and you’re in.
The next section is Traversing the Bog, and it’s where the raid teaches you Knowledge and Pervading Darkness. Your objective is to deposit nine total Knowledge buffs onto a payload barge to move it forward. Split your fireteam into two teams of three. One team collects Knowledge, the other team clears enemies and protects the collectors.
Knowledge Bearers spawn throughout the Bog. Kill them to drop Knowledge, then pick it up. You can hold up to three stacks at once. When you have stacks, run to the barge and deposit. The barge needs nine total deposits to move to the next stop, and there are three stops total before you reach the pyramid entrance.
Here’s the part that kills uncoordinated teams. Pervading Darkness starts stacking as soon as you move away from the barge. Stay too far from the barge for too long and you’ll hit ten stacks and die. The solution is simple: rotate back to the barge periodically to reset your stacks. Collectors should deposit their Knowledge, then stay near the barge for a few seconds to clear Pervading Darkness before running out again.
This section also contains the first hidden chest. You need to shoot three Cruxes (glowing dark crystals) at specific locations during the payload escort. First Crux: at the first stop, look under the fallen tree to the left. Second Crux: at the second stop, go to the end of the long hall and turn left into the corner. Third Crux: after the payload crosses a bridge at the third stop, look under the bridge inside a hole in the wall. Shoot all three and the chest spawns. Miss even one and you have to wait for another full run.
Once you’ve deposited nine Knowledge at the third stop, the door to the pyramid opens. Walk through and prepare for the first real encounter.
Acquisitions (Encounter 1): Obelisk Decoding and Defense

Acquisitions is the first encounter where deaths matter and checkpoints save. The objective is to decode and complete three obelisks by shooting the correct glyphs in the correct order. It’s a puzzle-combat hybrid that punishes slow play and poor communication.
The arena has three obelisks positioned around the room. Split your fireteam into two roles: Defenders (three players, one assigned to each obelisk) and Decoders (three players who move between vaults). Defenders stay near their obelisk, clear adds, and prevent enemies from damaging it. Decoders kill the Disciple’s Compass, enter vaults, and identify glyphs to call out.
Here’s the full sequence. A Disciple’s Compass enemy spawns somewhere in the arena. Kill it, and a glyph appears above its corpse. That glyph tells you which vault to enter. There are three vaults, each marked with a glyph above the door. Match the glyph from the Compass to the vault, then send your Decoders inside.
Inside the vault you’ll find Glyphkeepers, two Scorn Captains with solar shields, and a few Screebs. Kill the Glyphkeepers and two glyphs appear on a tapestry. Your Decoders need to memorize these two glyphs, then check the small statue inside the vault. The statue shows either “Light” or “Darkness.” If the statue shows Light, you record the glyph on the left side of the tapestry. If it shows Darkness, you record the glyph on the right. Call this glyph to your Defenders.
Repeat this process three times per obelisk. Once you have three glyphs for an obelisk, shoot those three glyphs on the obelisk windows in quick succession. If you shoot correctly, the obelisk accepts the offering and you move to the next one. If you shoot wrong, the obelisk fills faster and you’re closer to a wipe.
The failure state is obelisk energy. Each obelisk slowly fills with yellow energy. If it fills completely, the team wipes. Two things speed up the fill: shooting incorrect glyphs and letting enemies damage the obelisk. This is why Defenders exist. Unstoppable Abominations and waves of Scorn will spawn and rush the obelisks. If Defenders don’t kill them fast, the obelisks fill and you lose.
Grenade Launchers with Blinding Grenades are perfect for this encounter. Blind the Unstoppables, stun them with your champion mod, then burn them down. Gjallarhorn and other Heavy weapons delete Glyphkeepers instantly, so Decoders can get in and out of vaults faster.
When all three obelisks are completed, the encounter ends and you get your first loot drop.
Collection (Caretaker): Backroom Runs and Damage Plates

The Caretaker fight is the first major DPS check in Vow of the Disciple. It’s a four-floor gauntlet where you collect Knowledge, manage a roaming boss, and execute timed damage phases. Teams with weak loadouts or poor Heavy ammo management will not clear this encounter.
The fight happens across four floors. The first three floors have dark backrooms where you collect Knowledge. The fourth floor is a straight corridor with no backrooms. Every floor follows the same loop: collect nine total Knowledge (three excursions of three stacks each), deposit the Knowledge to lock the obelisk, then stand on three damage plates to deal damage to the Caretaker.
Split your fireteam into three teams of two: Bullying team, Backroom runners, and Enemy clearers. The Bullying team focuses entirely on the Caretaker. The Caretaker roams the arena and will chase players. When he gets close, shoot his face to stun him, then shoot the glowing weak spot on his back to fully stagger him. He’ll also fire homing missiles at players. Destroy these before they land. If the Bullying team fails to stun the Caretaker or misses too many missiles, the Backroom runners die.
Backroom runners enter the dark side rooms to collect Knowledge. These rooms are full of Shadow Thralls and two high-HP Wizards. Do not try to kill the Wizards. You don’t have time. Run in, grab three Knowledge stacks (they’re glowing white orbs scattered around the room), and get out. Pervading Darkness stacks rapidly inside the backrooms, so if you stay too long you die. Coordinate your runs. First player grabs three, deposits, and gets out. Second player does the same. Repeat until you’ve deposited nine total.
Enemy clearers handle all other threats. Scorn and Taken spawn constantly, and if adds overwhelm the arena, the Backroom runners can’t get in and out safely. Clear adds, assist with stunning the Caretaker, and make sure no one dies to trash mobs.
Once nine Knowledge are deposited, the obelisk locks and three damage plates light up one at a time. Each plate lasts ten seconds. Stand on the plate, shoot the Caretaker, then move to the next plate when it lights up. You have three plates per floor. Use Wells of Radiance, Lunafaction Boots, and Rally Barricades to maximize damage. Gjallarhorn with Palmyra-B is the best combo here. If you run out of Heavy, swap to Outbreak Perfected and spam grenades.
After the third plate on each floor, the Caretaker disappears and the team climbs to the next floor. The backrooms get bigger and more complex on higher floors. Floor two has two backrooms. Floor three has three. The fourth floor has no backrooms, just three plates in a straight corridor. If you don’t kill the Caretaker by the end of floor four, you wipe.
Heavy ammo is the most common reason teams fail Caretaker. If you’re dry by floor two, you’re done. Assign ammo finders, use scavenger mods, and don’t waste rockets on adds. Save your Heavy for plates.
Jumping Puzzle 1: Platform Coordination
After Caretaker you’ll hit the first jumping puzzle. This is a short coordination exercise, not a mechanics test. Platforms move and lock after enough players pass over them. Shoot the central control object to activate the sequence, then take turns jumping across. Enemies spawn throughout, so don’t stand still. Once everyone’s across, you’re through.
This is also where you’ll find checkpoint saves if someone needs to leave and rejoin later.
Exhibition (Encounter 3): Artifact Relay and Timer Management

Exhibition is the longest and most mechanically dense encounter in the raid. You’ll move through multiple rooms, juggle three different artifacts, decode glyphs under time pressure, and manage champion spawns. Teams that try to brute-force this encounter without a plan will run out of time and wipe repeatedly.
The goal is to move through a series of rooms, kill Glyphkeepers, decode matching glyphs, and deposit artifacts to extend your timer. You start with Terminal Resonance, a countdown timer that begins at one minute and 15 seconds (75 seconds) when the first artifact is picked up. If the timer hits zero, you wipe. The only way to extend the timer is to kill Disciple’s Hourglass enemies (shielded Knights that add time when killed) and deposit artifacts on altars.
There are three artifacts, and each has a specific purpose:
Resonant Shard fires a laser that removes the white immunity shield from Disciple’s Hourglass enemies. Without this artifact, you can’t kill the Hourglass and you can’t extend your timer.
Aegis Shield cleanses Pervading Darkness stacks. Pervading Darkness builds constantly in this encounter, and if you don’t cleanse regularly, players will hit ten stacks and die.
Taken Artifact (the Eye of Riven) destroys Taken tether blights. These blights create immunity links between enemies. Grenade the blight to break the link.
Artifact holders have a 30-second cooldown after dropping an artifact before they can pick up another one. This means you need to rotate who holds artifacts. If one player holds the Resonant Shard the entire time, you’ll hit points where no one can pick up the Aegis and the team dies to Pervading Darkness.
The rooms escalate in complexity. Room one requires one artifact. Room two requires two. Room three requires all three, and room four adds multi-glyph decoding on top of artifact juggling.
Here’s the loop for each room. Pick up the required artifact(s). Kill Glyphkeepers, these are a mix of Taken and Scorn enemies. When Glyphkeepers die, they reveal sets of glyphs. You need to find the duplicated glyph between the sets. For example, if one Glyphkeeper shows “Traveler, Pyramid, Light” and another shows “Darkness, Pyramid, Worship,” the matching glyph is Pyramid. Shoot that glyph on the doorframe to open the exit, then deposit the artifact on the altar in the next room.
Each deposit extends the timer. Killing a Disciple’s Hourglass also extends the timer. The rhythm is: pick artifact, clear room, decode glyphs, deposit artifact, repeat.
Overload Champions spawn in later rooms. If you don’t have Overload mods slotted, these champions will not die and you’ll run out of time. Bring the mods.
The best strategy is to split into two teams of three and clear left and right sides simultaneously, but this requires high coordination. If your team is learning the encounter, move as a group of six. It’s slower, but you’ll have an easier time cleansing Pervading Darkness and handling champions.
Roaming Supers like Arcstrider, Striker Titan, or Nova Warp are valuable here for clearing waves of adds quickly. Grenade Launchers with Blinding Grenades control champions and dense spawn points.
When you clear the final room and deposit the last artifact, the encounter ends.
Jumping Puzzle 2: Ascent to Rhulk

The second jumping puzzle is simpler than the first. It’s a vertical ascent with platforms and some enemy spawns. Move carefully, don’t rush, and you’ll reach the stairs to Rhulk’s arena without issue.
Rhulk, Disciple of the Witness: Decoding, Weak Points, and Damage Windows
Rhulk is a two-phase encounter that alternates between a Decoding phase and a Damage phase. You’ll repeat this loop up to three times. If you don’t kill Rhulk by the end of the third damage phase, he enrages and wipes the team.
The fight starts in the Decoding phase. Shoot the floating spiral in the center of the arena to gain Leeching Force, a yellow debuff. One player with Leeching Force should stand on the central plate, which spawns two small spiral crystals. Two other players shoot those crystals to gain Leeching Force themselves. This spreads the buff across the team.
Next, you need to convert Leeching Force into Emanating Force. To do this, the player with Leeching Force runs into Rhulk’s darkness beam attack. Yes, you get hit on purpose. When the beam hits you, Leeching Force converts to Emanating Force.
Now you need to deposit Emanating Force into the correct tower (obelisk). Glyphkeepers spawn on the left and right sides of the arena and reveal glyphs when killed. Some glyphs are only visible to players with Leeching Force. Call out all visible glyphs, identify the matching glyph, then find which two towers display that glyph. Deposit Emanating Force into one of those towers.
You need six total Emanating Force deposits to push Rhulk’s forcefield back to the stairs and trigger the next phase. Repeat the Leeching to Emanating loop until you’ve made six deposits.
Once the forcefield recedes, Rhulk ascends into the main arena and the fight shifts. He’ll stab his glaive into the ground. Shoot the glaive to gain Leeching Force, and a glyph appears. Call the glyph to your team, identify the matching tower, then convert Leeching Force to Emanating Force (same method, run into the darkness beam) and deposit at the correct tower.
Each deposit staggers Rhulk and reveals a weak point on his body. Destroy the weak point to spawn another glaive. Repeat this sequence four times: shoot glaive, identify glyph, convert buff, deposit, destroy weak point. After the fourth weak point is destroyed, you enter the damage phase.
During the damage phase, stack your team, pop Well of Radiance, and burn Rhulk with Heavy weapons. Divinity is critical here. One player runs Divinity to create a precision bubble on Rhulk’s body, and the rest of the team uses Sleeper Simulant or other Linear Fusion Rifles to delete his health bar. If you don’t have Divinity, Gjallarhorn with Palmyra-B works, but you’ll deal less total damage.
Save one-shot Supers for the final stand. When Rhulk’s health drops into the final segment, he moves constantly and blasts the arena with darkness beams. Pervading Darkness stacks rapidly. You have ten seconds (ten stacks) to finish him before everyone dies. Thundercrash, Nova Bomb, and Celestial Nighthawk Golden Gun are perfect here. Cast your Super, then immediately swap to Divinity or Heavy to stack damage.
If you fail to kill Rhulk during the damage phase, the cycle resets and you repeat Decoding and Damage again. You get three full cycles before enrage.
Common mistakes that cause wipes: losing Leeching Force because no one has it (if this happens, kill Glyphkeepers to reset), depositing Emanating Force at the wrong tower, failing to destroy weak points fast enough, and running out of Heavy or Supers by the third damage phase. Coordinate your ammo economy, assign roles (two players rotate Leeching Force, one dedicated depositor), and predefine tower callouts (Left 1, Left 2, Left 3, Right 1, Right 2, Right 3) before the fight starts.
When Rhulk dies, the raid is complete.
Final Words
Stack on plates, call the debuff timer, and kite the boss into cover—these are the core actions that win encounters. The guide broke the raid into clear mechanics, role calls, and simple rotations so you can jump in and perform.
Assign plate runners, a disc holder, and consistent DPS windows. Use the recommended loadouts, practice timing, and use the recovery lines when things go wrong.
If you keep communication tight and follow this Destiny 2 Vow of the Disciple raid walkthrough mechanics and roles roadmap, runs will smooth out fast. You’ve got this.
FAQ
Q: How difficult is the vow of the disciple?
A: The Vow of the Disciple raid is one of Destiny 2’s tougher encounters, requiring high team coordination, strict mechanic execution, and decent DPS. New groups should expect a steep learning curve.
Q: What is the most difficult raid in Destiny 2?
A: The most difficult raid in Destiny 2 varies by skill and group. Many players consider Last Wish, Vault of Glass, or Garden of Salvation the hardest because they demand tight coordination, puzzles, and high DPS.
Q: What’s the deal with the symbols in the Vow raid?
A: The symbols in Vow of the Disciple mark plate positions and scanning order for mechanics. They tell your fireteam which plates to activate and when, essential for puzzle phases and progression.
Q: What’s the secret chest in Vow of the Disciple?
A: The secret chest in Vow of the Disciple is a hidden loot cache you unlock by completing an optional puzzle or sequence. It sits in a tucked-away area and can drop raid-exclusive gear and materials.