
Think tanking is just spamming defense cooldowns and hoping healers keep you alive?
A proper dungeon tank loadout for boss mechanics and threat control is deliberate gear, stats, and cooldown timing.
Focus armor, stamina, and mitigation first, add threat gems and fast weapon speed, then slot a shield and cooldowns so you survive nukes and stay 15–25% ahead of DPS during bursts.
This guide gives the quick setup, when those stats fail, and the simple swaps you need mid-fight.
Core Tank Loadout Overview for Dungeon Boss Fights

Your dungeon tank loadout for boss mechanics comes down to three things: not dying when big damage hits, keeping the boss glued to you even when DPS goes hard, and parking the boss somewhere it won’t murder your team. You build this on defensive stats. Armor, stamina, and mitigation rating. Armor cuts physical damage by a percentage. Stamina is your health cushion. Mitigation rating lowers all incoming damage. Block value and dodge give you ways to react to telegraphed attacks without blowing cooldowns. These stats need to hit minimum thresholds or you can’t tank abilities that delete 30 to 50 percent of your health in one shot.
Threat comes from two places: how much damage you do and how much your gear multiplies that into aggro. You need items that pump threat per second. Fast weapons, enchantments that add flat threat to every swing. Tanks who skip threat gear lose the boss during DPS cooldown windows. Healers panic, group damage tanks, everything falls apart. Stack threat modifiers on rings, necklaces, weapon gems. A solid setup keeps you 15 to 25 percent ahead of DPS during their burst while keeping mitigation high enough to eat the boss’s worst hits.
Baseline boss ready gear looks like this: primary weapon with a threat gem, heavy armor everywhere, a shield with block strength or an off hand that boosts survivability, accessories that blend stamina with cooldown reduction. Enchantments should target armor, stamina, or threat depending on what you’re short on. Consumables like damage reduction potions and stamina food cover short term gaps when your base stats fall just under what the boss demands.
- Heavy armor set with high base armor and stamina in every slot
- Threat gem in your weapon so you can actually hold aggro
- Shield or defensive off hand with block strength, mitigation, or cooldown reduction
- Accessories focused on stamina, threat radius, cooldown reduction
- Consumables for mitigation or stamina during damage spikes you can predict
Defensive Stat Priority Breakdown

Armor is your first defense. It cuts physical damage by a percentage that scales with total armor value. But most dungeon bosses deal mixed physical and magical damage, so armor alone won’t cap your survivability. Stack it until you hit diminishing returns, usually around 40 to 50 percent physical reduction, then shift focus. If your armor’s too low, one boss cleave can rip away 60 percent of your health before you can hit anything.
Stamina turns into max health. It gives you a bigger buffer to absorb burst and buys time for healer reactions. Bosses with multi hit combos or phase transition nukes need stamina pools 20 to 30 percent higher than the boss’s biggest single hit. If a boss ability deals 12,000 damage, you want at least 15,000 health after mitigation to survive with room for error. Low stamina makes you fragile against unlucky crit chains or overlapping mechanics that slip past part of your mitigation.
Secondary mitigation stats like block value, dodge chance, and flat damage reduction fill what armor and stamina leave open. Block value cuts damage from blocked attacks by a fixed amount. Good against rapid auto attacks. Dodge chance lets you avoid entire abilities, but it’s unreliable against scripted boss mechanics with no miss table. Flat damage reduction applies after armor and works on all damage types. Most consistent secondary mitigation for magic heavy bosses.
- Armor: stack to 40 to 50% physical reduction, then shift
- Stamina: aim for health 20 to 30% above the boss’s biggest hit
- Block value: strong against fast autos, weak against slow nukes
- Flat damage reduction: applies universally, best for mixed damage
Optimal Gear Selection for Dungeon Tanks

Start with heavy armor in every slot. It gives the highest base armor and stamina values. Light or medium armor trades survivability for damage or mobility. Neither helps you survive boss mechanics or hold threat against geared DPS. Each armor piece should have stamina as the primary stat, with armor or mitigation as secondary rolls. Skip pieces with offensive stats like crit or haste unless you’re over geared and threat is effortless. Reforge or enchant every slot to add stamina, armor, or block strength depending on which stat is furthest below your target.
Weapon choice depends on threat generation and utility. Sword and shield gives the best balance of threat, survivability, and control. Shield block adds a powerful reactive defense. One handed weapons with fast attack speed generate more consistent threat than slow two handers because threat scales per hit, not per damage instance. Slot a threat gem in your weapon to multiply aggro output by 200 to 300 percent. If your class allows off hand items beyond shields, go stamina or cooldown reduction over damage stats. Weapons with on hit effects that apply debuffs or generate bonus threat are worth using even if base damage is slightly lower.
Accessories are the highest value slots for min maxing. They can carry unique effects that don’t appear on armor. Rings and necklaces with threat radius bonuses make sure your aggro abilities affect all nearby enemies. Critical for multi target boss phases. Stamina is the safest primary stat for accessories, but cooldown reduction becomes more valuable once your health pool is comfortable. Skip accessories with pure DPS stats like attack power or penetration. Enchant rings and necks with flat stamina or percentage based mitigation if your system allows it. Match your enchantments to the boss’s primary damage type when possible.
Talent and Skill Build Optimization

Dungeon tank talent builds break into three categories: survival, threat, and control. Survival talents increase your health pool, cut cooldown timers on major defensive abilities, or boost passive mitigation like armor or block chance. These are required for progression content where one missed cooldown wipes the group. Threat talents amplify aggro generation. They add flat threat to all damage or boost the multiplier on taunt abilities. You need enough threat talents to stay ahead of DPS during their cooldown windows. Typically 15 to 25 percent more total threat than the highest damage dealer.
Control talents improve crowd control duration, cut the cooldown on interrupts, or add utility like movement speed during repositioning. These shine in fights with add spawns or bosses that need frequent repositioning to dodge ground effects. Skip control talents if the boss is a single target burn with no adds and predictable mechanics. Always take at least one interrupt cooldown reduction talent. Missed interrupts on boss casts often lead to wipes or force healers to burn mana on avoidable damage.
Most dungeon tank builds invest 60 to 70 percent of available points into survival, 20 to 30 percent into threat, 10 percent into control or utility. If you’re losing threat to DPS, shift 5 to 10 percent of survival points into threat until aggro stabilizes. If the group struggles with add control, move points from threat into crowd control or AoE taunt improvements. Respec before difficult bosses to match talent distribution to expected mechanics.
- Survival: health, mitigation, cooldown reduction on defensive abilities
- Threat: aggro multipliers, taunt potency, damage to threat conversion
- Control: stun/interrupt duration, AoE taunt radius, repositioning speed
- Utility: situational picks like movement, resistances, emergency escapes
Consumables and Enhancements for Boss Encounters

Stamina food is the baseline consumable for every dungeon boss. It directly increases your health pool by 200 to 400 points, giving you margin to survive unexpected burst or healing gaps. Use the highest tier stamina food your level and budget allow. If the boss deals primarily magical damage, swap to food that grants elemental resistance instead, especially if your mitigation set is armor heavy. Food buffs last 20 to 60 minutes depending on quality. Apply it before entering the dungeon and refresh between long boss attempts.
Defensive potions provide short term mitigation or absorption during scripted damage windows. Damage reduction potions cut incoming damage by 15 to 30 percent for 20 to 30 seconds. Perfect for boss phases where you know heavy damage is coming but your major cooldowns are down. Instant heal potions restore 25 to 40 percent of your health on a 60 to 120 second cooldown. Useful as an emergency button when healers are crowd controlled or out of mana. Bring at least two of each potion type for progression bosses with multiple dangerous phases.
Flasks and elixirs offer longer duration buffs, usually 20 to 30 minutes, that increase stamina, armor, or threat generation by 10 to 20 percent. Use a mitigation flask for learning attempts when survival is the bottleneck, then swap to a threat flask once mechanics are clean and DPS is optimized. Elixirs stack with food and potions. Always run a defensive elixir on hard bosses.
- Stamina food: +200 to 400 health for 30 to 60 minutes
- Damage reduction potion: 15 to 30% less damage for 20 to 30 seconds
- Instant heal potion: restores 25 to 40% health, 60 to 120s cooldown
Cooldown Rotation and Damage Mitigation Strategy

Good cooldown management separates tanks who survive boss mechanics from tanks who force healer cooldowns or wipe the group. Major cooldowns like damage immunity or massive damage reduction (50 to 100 percent for 3 to 8 seconds) should be saved for the boss’s hardest hitting abilities or unavoidable raid wide damage. Use these when you can predict the damage window, not reactively after you’ve already taken the hit. If a boss has a three phase structure with a nuke at each transition, plan to use your major cooldown at phase two and three. Rely on medium cooldowns for phase one.
Medium cooldowns provide 25 to 50 percent damage reduction for 8 to 12 seconds and typically have 30 to 60 second recharge timers. These are your workhorses for handling predictable cleaves, dot ticks, or add damage. Stagger medium cooldowns so you always have at least one available during high damage windows. If the boss has a cleave every 15 seconds, rotate two medium cooldowns to cover alternating cleaves instead of stacking both on the first cleave and having nothing for the second.
Short cooldowns with 10 to 20 second timers and smaller mitigation values (10 to 20 percent reduction for 6 to 10 seconds) fill the gaps between medium cooldowns. Use these on auto attack windows or minor mechanics to smooth incoming damage and reduce healer strain. Track your cooldown availability with an add on or mental timer so you know what will be ready for the next scripted ability. If multiple cooldowns come off cooldown simultaneously, save the stronger one for the next dangerous phase and spend the weaker one immediately.
| Cooldown Name | Primary Use Case |
|---|---|
| Major immunity/absorb | Boss enrage, phase transition nukes, or guaranteed lethal mechanics |
| Medium mitigation | Predictable cleaves, heavy auto attack sequences, or add burst windows |
| Short mitigation | Filler for gaps between medium cooldowns or low damage phases |
| Instant heal | Emergency recovery when healer is locked out or mana starved |
| Threat dump or taunt | Reclaim aggro after DPS burst or reposition boss quickly |
Boss Positioning and Control Fundamentals

Always position yourself between the boss and the rest of the group so any frontal cleaves or cone attacks hit only you. Face the boss away from your team, usually toward a wall or corner to minimize movement and give DPS maximum uptime. Small adjustments in angle can prevent cleaves from clipping nearby melee players. Stay aware of boss hitbox orientation and adjust when DPS shifts position for mechanics.
When the boss casts a telegraphed ground AoE or line attack, sidestep just enough to avoid the damage zone without turning the boss toward the group. Move back to your original position immediately after the attack resolves to keep the boss facing consistent. Excessive movement rotates the boss unpredictably and forces melee DPS to reposition, cutting their damage and sometimes putting them in danger from follow up mechanics. If the boss has a knockback ability, position yourself so the knockback pushes you into open space or toward a wall, not into additional enemies or off a ledge.
For bosses that spawn adds, pre position to intercept adds as they enter the arena while maintaining threat on the boss. Use terrain like pillars or doorways to funnel adds into cleave range, then apply AoE threat to secure them before they scatter. Keep secondary targets within 5 to 8 meters of the boss when possible so cleave damage from DPS naturally controls them. If adds must be separated from the boss, assign off tank responsibilities or use control abilities to cluster them in a designated kill zone.
- Face the boss away from the group, toward walls or corners for stability
- Sidestep telegraphed attacks with minimal movement to avoid rotating the boss
- Position to intercept adds while maintaining boss threat and line of sight
- Use terrain to funnel adds into cleave range or isolate dangerous spawns
Class by Class Tank Comparison
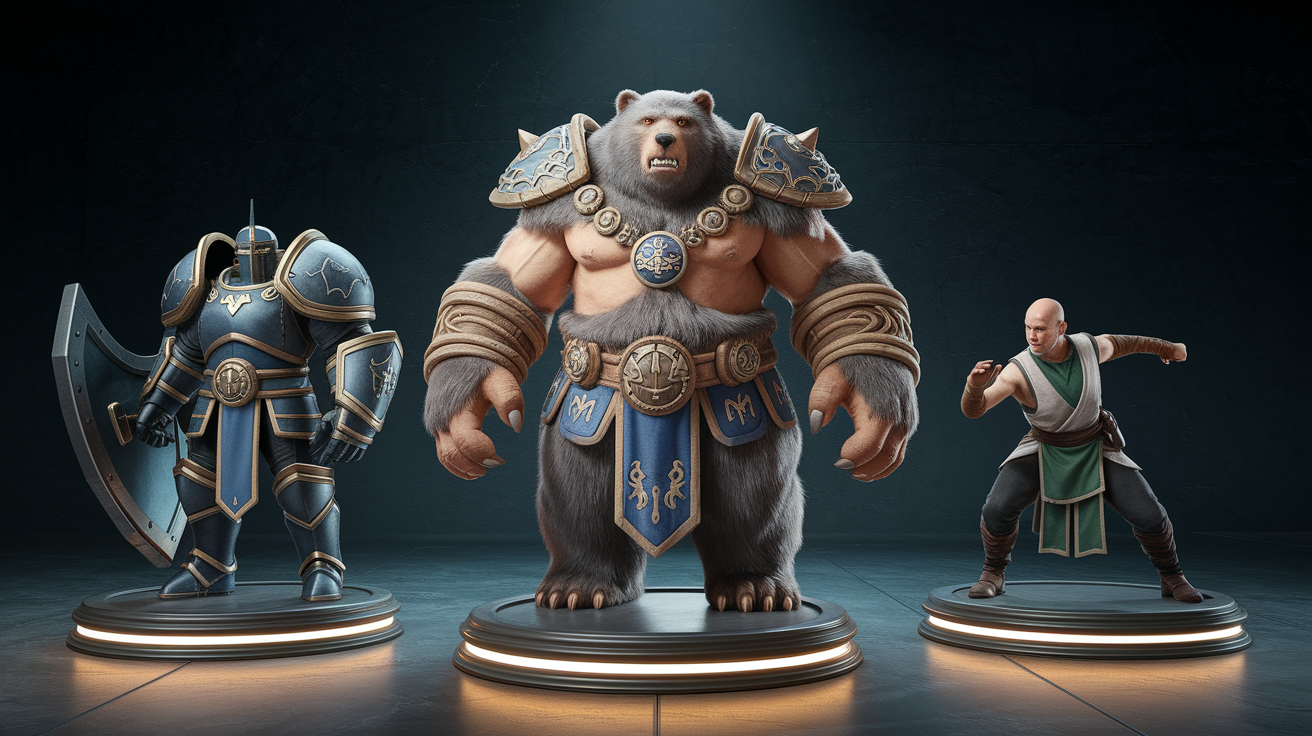
Shield based tanks like warriors or paladins offer the highest raw mitigation through block mechanics and passive armor buffs. They’re the safest choice for learning new bosses or handling heavy physical damage. Block reduces incoming damage by 30 to 50 percent on blocked hits, and shield abilities often include threat multipliers or group utility. The downside is lower personal damage output, which can make threat generation harder against well geared DPS unless you invest heavily in threat talents and gems. Shield tanks work best in structured dungeon content with predictable mechanics.
Health pool tanks like druids or death knights rely on massive stamina and self healing to absorb damage, with less emphasis on avoidance or block. These tanks have higher health totals, often 20 to 40 percent more than shield tanks, and can recover health through lifesteal or healing cooldowns. They need more aggressive threat gear because their base mitigation is lower. Healers must adapt to larger health swings instead of steady, blocked damage. Health pool tanks perform well in fights with magic damage or dot effects that bypass armor.
Evasion tanks like monks or rogues use dodge, parry, and mobility to avoid damage entirely rather than mitigating it. They have the lowest base armor and health but the highest movement speed and repositioning tools. Strong for bosses with heavy movement or positional requirements. The risk is that dodge and parry are chance based, so damage intake is less predictable and can spike if avoidance fails during a critical window. Evasion tanks are the hardest to heal and require the most player skill to execute cleanly.
| Class | Strengths | Weaknesses |
|---|---|---|
| Shield tanks | High block mitigation, stable damage intake, strong utility | Lower personal damage, requires threat investment |
| Health pool tanks | Massive stamina, self healing, magic damage mitigation | Large health swings, healer adaptation required |
| Evasion tanks | High mobility, avoidance mechanics, repositioning speed | Unpredictable damage spikes, hardest to heal |
| Hybrid tanks | Flexible stat allocation, adaptable to content | Jack of all trades, master of none |
Common Tanking Mistakes and How to Avoid Them
The most frequent mistake is burning all major cooldowns too early in a boss fight, leaving nothing available for later phases when damage ramps up or mechanics stack. Map out boss phases before the pull and assign specific cooldowns to specific danger windows. If you use your immunity cooldown in phase one on a mechanic you could have survived with a medium cooldown, you’ll wipe when the phase three enrage hits. Save your strongest tools for the hardest moments.
Poor positioning that exposes the group to cleaves or forces excessive movement kills more groups than low gear. Always face the boss away from your team and minimize how much you move the boss during mechanics. Spinning the boss randomly or backing up into the group causes melee DPS to eat avoidable damage and waste time repositioning. Plant your feet, use sidesteps for telegraphs, and only reposition when a mechanic absolutely requires it.
Neglecting threat gear or talents because you assume your role automatically holds aggro is a fast way to lose the boss to a critical hit from DPS. Forces a tank swap or a wipe when the boss kills a squishy target. Threat isn’t automatic. You build it through damage, taunt abilities, and gear modifiers. Check your threat lead on DPS meters and adjust your loadout if you’re only 5 to 10 percent ahead during their burst windows. Comfortable threat margin is 15 to 25 percent above the highest DPS.
- Burning all major cooldowns early instead of saving them for later phases
- Facing the boss toward the group or moving unnecessarily during mechanics
- Ignoring threat gear and losing aggro during DPS burst windows
- Forgetting to use consumables or letting food/flask buffs expire mid fight
- Standing in avoidable damage and forcing healers to waste mana on preventable mistakes
Final Words
At the pull you need armor, stamina, solid threat, and good cooldown timing. This guide gave a core tank loadout and covered stat priorities, slot gear, talents, consumables, cooldown rotation, positioning, class tradeoffs, and common mistakes.
Decision rule: if the boss spikes, favor mitigation and stagger cooldowns. If you lose aggro, swap to threat enchants and burst threat. Don’t hold cooldowns for too long.
Use this dungeon tank loadout for boss mechanics and threat control as your baseline. Tweak per fight and you’ll be steadier on pulls.
FAQ
Q: Which is the tankiest class in D&D?
A: The tankiest class in D&D is usually the Fighter or Paladin, thanks to high hit points, heavy armor and shields, defensive fighting styles, and class features that reduce damage or restore HP.
Q: What is the most overpowered build in D&D 5e?
A: The most overpowered build in D&D 5e depends on the table, but common picks are Sorlock (Sorcerer/Warlock) or crit-heavy fighter builds with Great Weapon Master, exploiting action economy and spell/feat synergies.
Q: What is tank fallacy?
A: Tank fallacy is the mistaken belief that stacking raw defenses alone makes a good tank; it ignores threat management, cooldown timing, boss mechanics, mitigation strategies, and the healer or team resource costs.
Q: Why are heavy tanks not used anymore?
A: Heavy tanks are less used because modern warfare values mobility, logistics, sensors, and precision strike; powerful anti-armor systems and air threats make extremely heavy armor costly and less flexible.